Overview
Important Notes
- This workflow automates payment plan statements to be mailed to the patient (text/email is not supported for Plan statements at this time)
- The patient will be tagged with $ PLAN
- The payment plan feature does not currently auto-charge credit cards
- Online Payments must be set up to access the Payment Plan feature
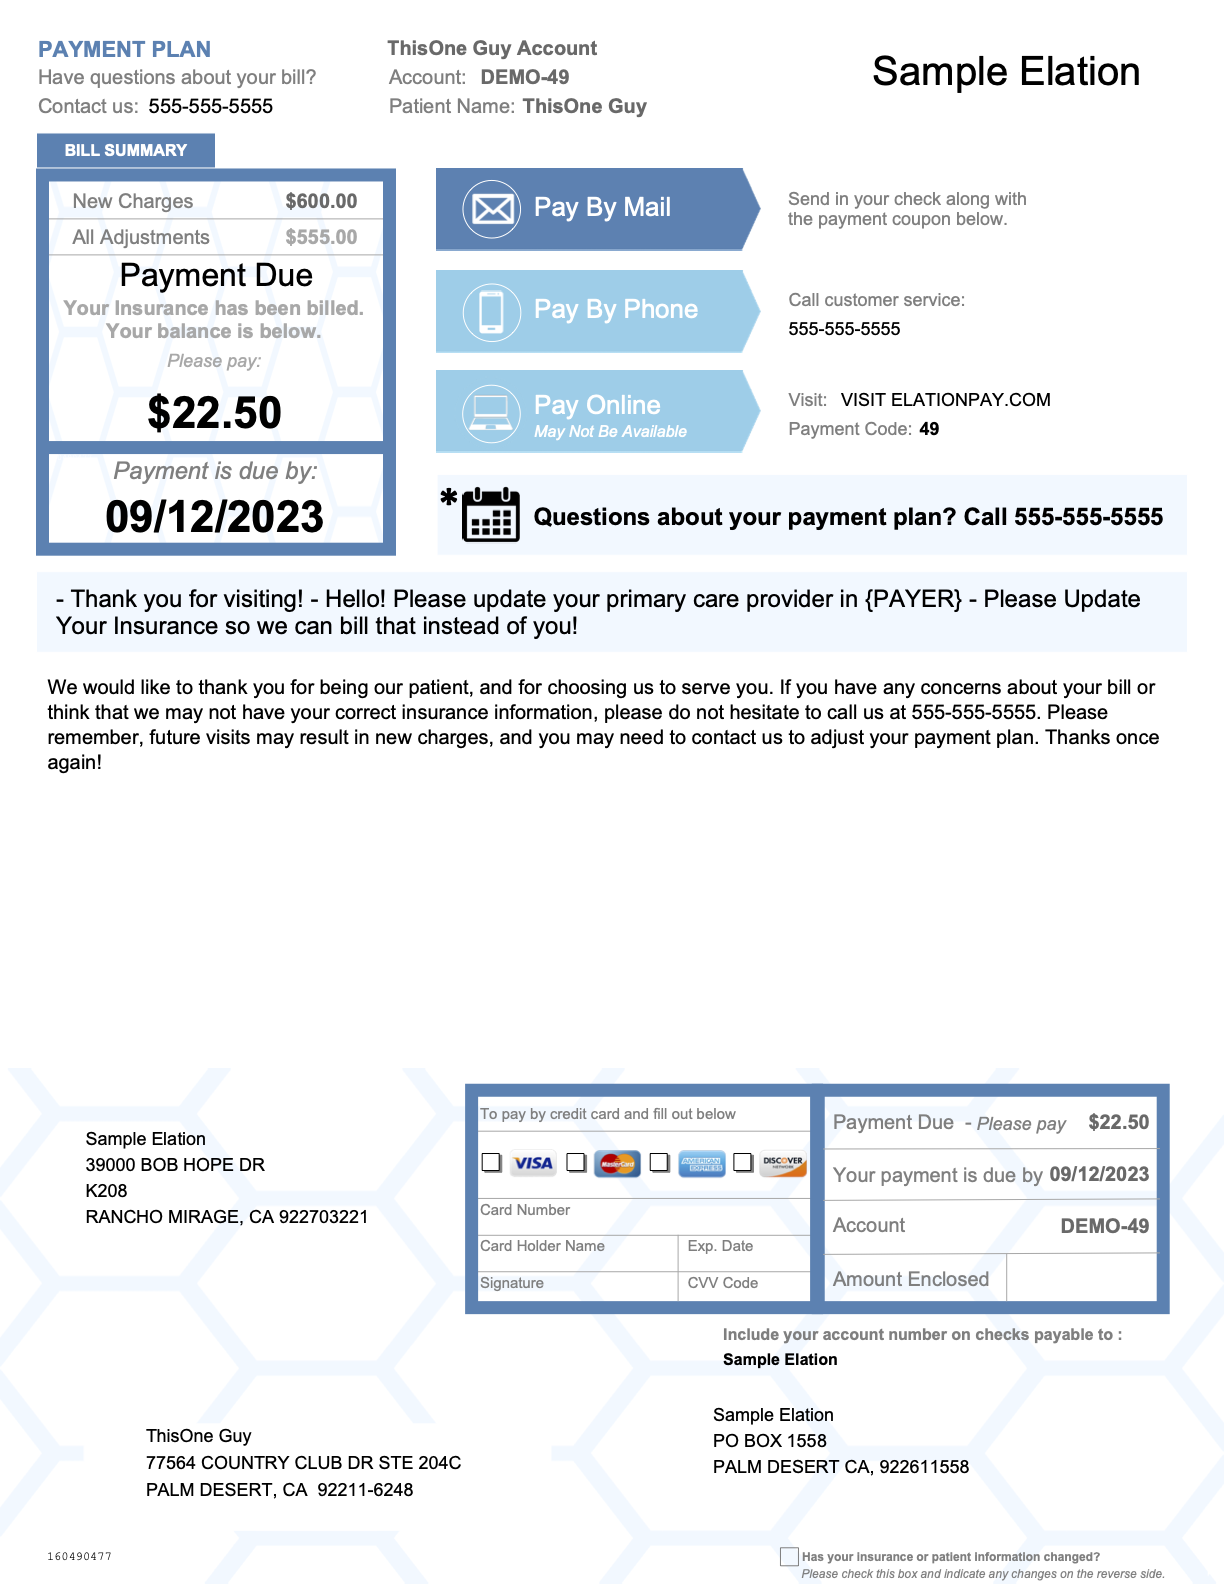
Example Payment Plan Statement
Plan Statements are similar to standard statements with notable differences:- Blue coloration (opposed to standard Green/Yellow/Red)
- PAYMENT PLAN in the upper-left
- Shows Payment Due (amount due now) in addition to Owed By You (total balance)
Workflow Instructions
Creating a Payment Plan
-
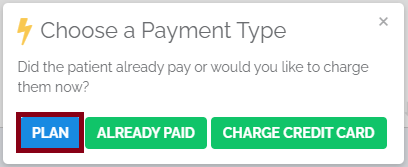
Choose the Patient - On the patient page, click COLLECT NOW to collect a payment. Click the Payment Plan button.
-
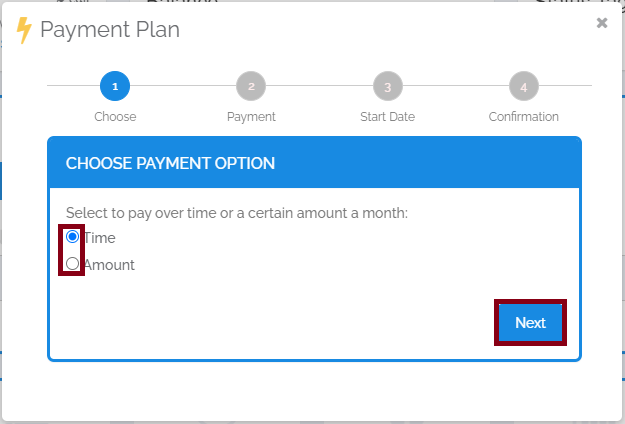
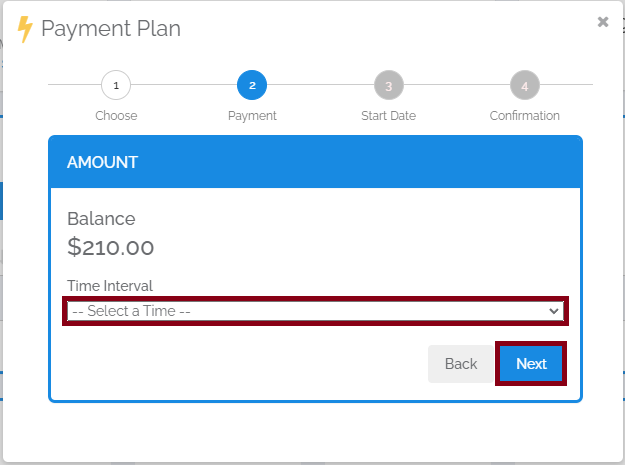
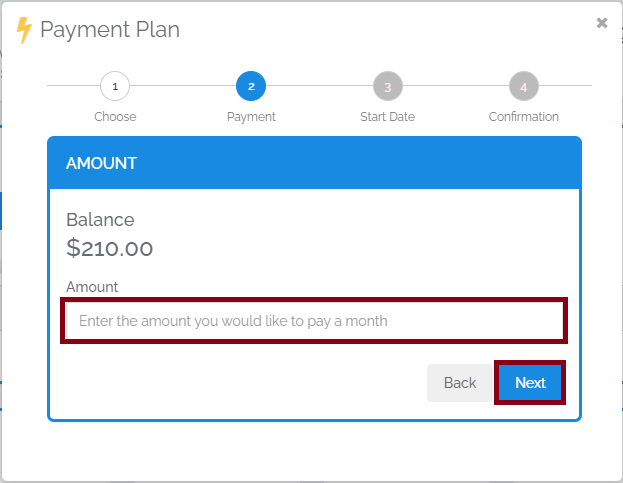
Select Payment Option - Choose to pay by Time (set time period to pay off balance) or Amount (set monthly payment amount).
-
Configure Payment - For Time option, select a timespan. For Amount option, enter the monthly payment amount.
-
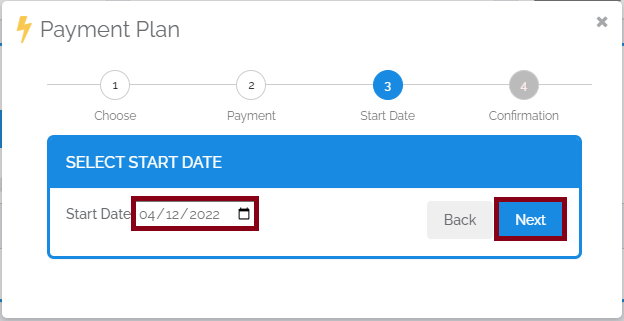
Select Start Date - Choose when payments are due each month.
-
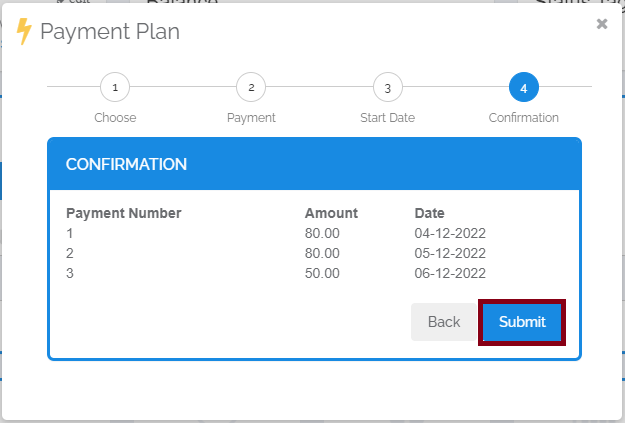
Confirm - Review the summary showing due dates, amounts, and payment numbers. Click Submit to start the plan.
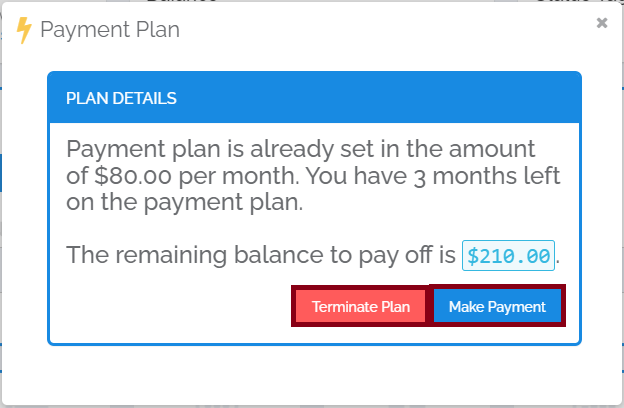
Managing Active Plans
When a plan is active, clicking the Plan button shows:- Amount owed per payment
- Months left on the plan
- Remaining pay-off balance
- Options to terminate the plan or make a payment
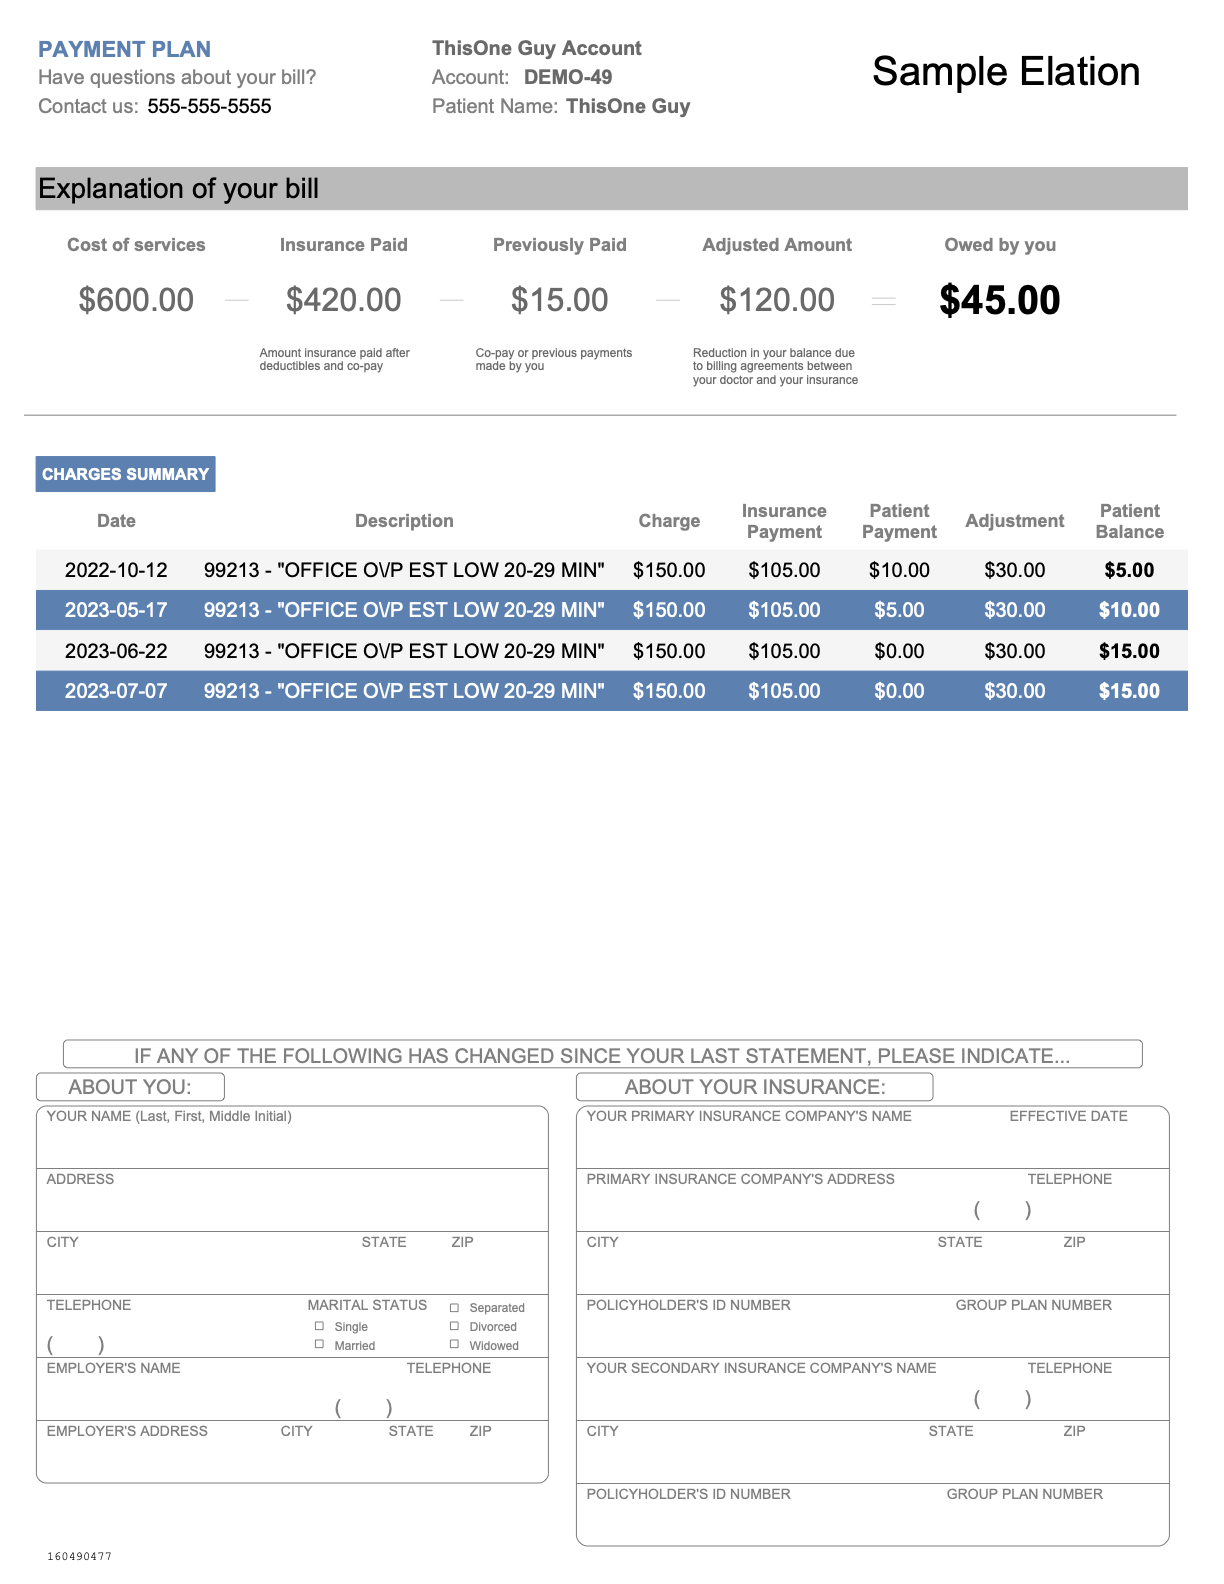
For a new balance to be included in a Payment Plan, the current plan must be terminated and a new one begun. Patients can only be on one plan at a time.