
Premium Scheduling is a product for Premium EHR customers only. If you are interested in upgrading to the Premium EHR subscription to use this feature, click the I need help button to notify Elation and a member of the Elation Team will reach out to assist you. If you have Premium EHR and Find Open Slots does not appear on the Calendar, click I need help > Contact Elation Support.
Premium Scheduling is currently in early access and is only available to a select number of practices.
Setup
Multi-encounter search uses the same provider availability as a single-encounter search. A day appears in the results only if every provider in the visit has open availability for their encounter. Before you search, confirm that each provider has availability set under Settings > Calendar & Booking > Availability, with the appointment types you plan to book enabled. See Specifying Provider availability by Practice Location & Appointment Type.Build the visit
1
Open Find Open Slots and choose the patient
Click Find Open Slots in the Calendar toolbar and select the patient. See Finding open slots for details.
2
Open the Multi-encounter visit tab
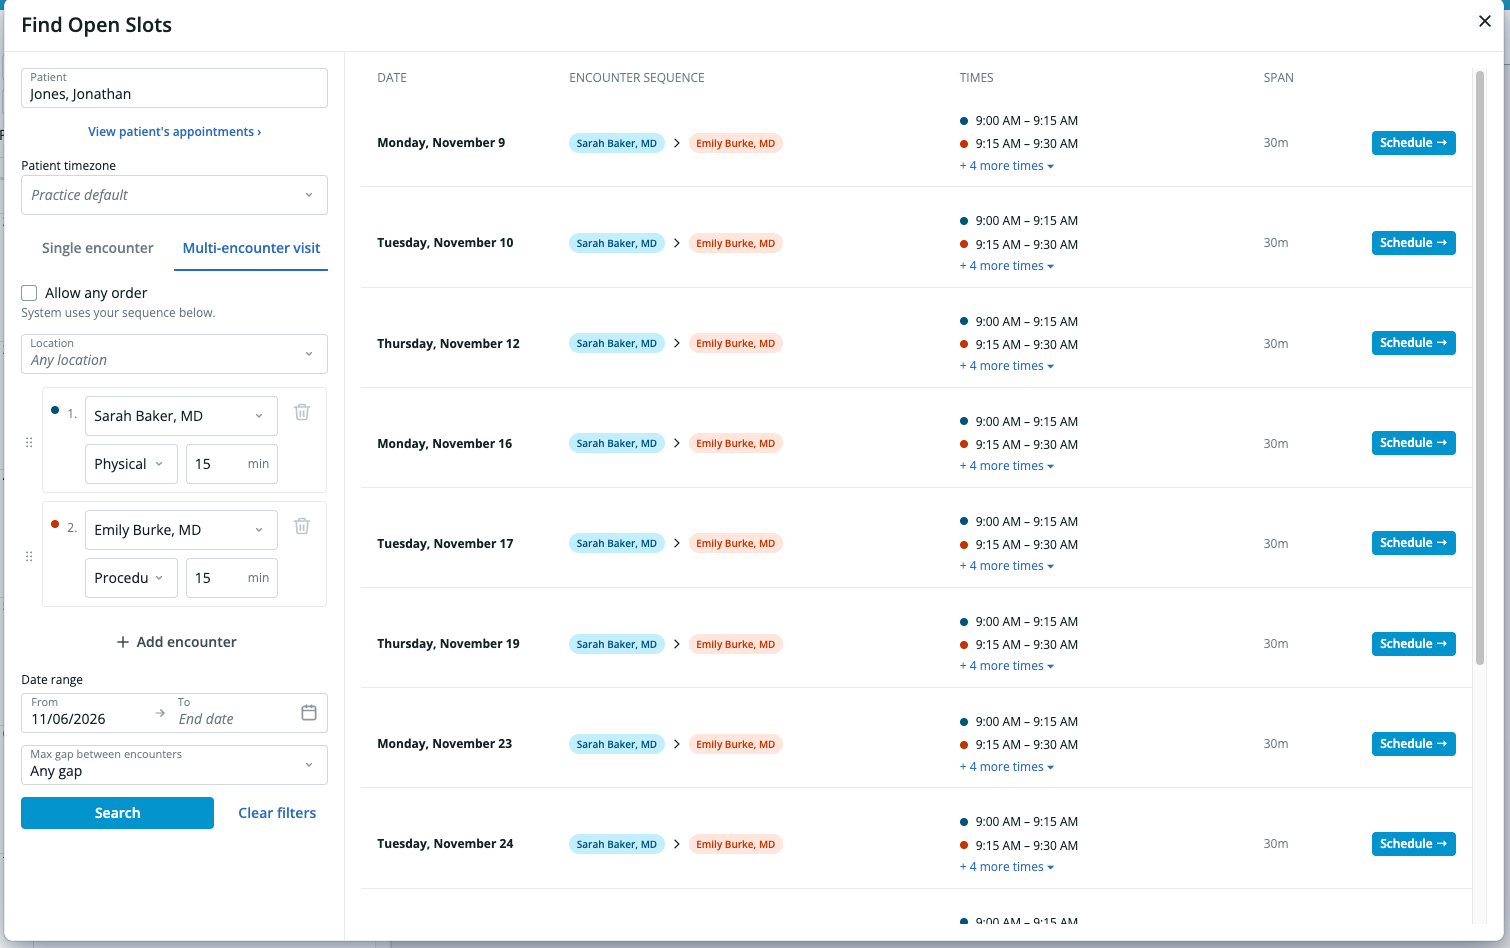
Select Multi-encounter visit. The form starts with two encounters.
3
Set up each encounter
For each encounter, choose a provider under Select provider and an appointment type. The duration fills in from the appointment type. Edit the minutes if this encounter needs a different length.Click Add encounter to add more. A visit needs at least two encounters. Click Remove encounter to delete one.
4
Choose the order
Drag encounters to set the sequence. When Allow any order is off, Elation searches only for days that fit your sequence.When it is on, Elation checks every possible order of the encounters and shows the order with the shortest total time from the first encounter’s start to the last encounter’s end. This can surface earlier availability and more options, including days that do not work in your sequence. Turn it on when the patient does not need the encounters in a specific order.
5
Set location, dates, and gap
- Location: Optionally limit the search to specific locations.
- Date range: Use the same limits as a single-encounter search.
- Max gap between encounters: Choose Any gap, ≤ 30 min, ≤ 1 hour, ≤ 2 hours, ≤ 4 hours, or ≤ 8 hours to control how long the patient waits between encounters.
6
Search
Click Search. To start over, click Clear filters.
Review the results
Elation lists the days when every encounter can be scheduled. For each option, you see:- Date
- Encounter sequence: The providers in order, with a matching color for each encounter.
- The time each encounter starts and ends. If an appointment type has a slot capacity above 1, the seats left appear next to the time.
- Span: The total time from the first encounter’s start to the last encounter’s end, such as 30m or 2h 15m. (reordered) appears next to it when Elation changed your sequence.
Book the visit
- Click Schedule → on the option you want.
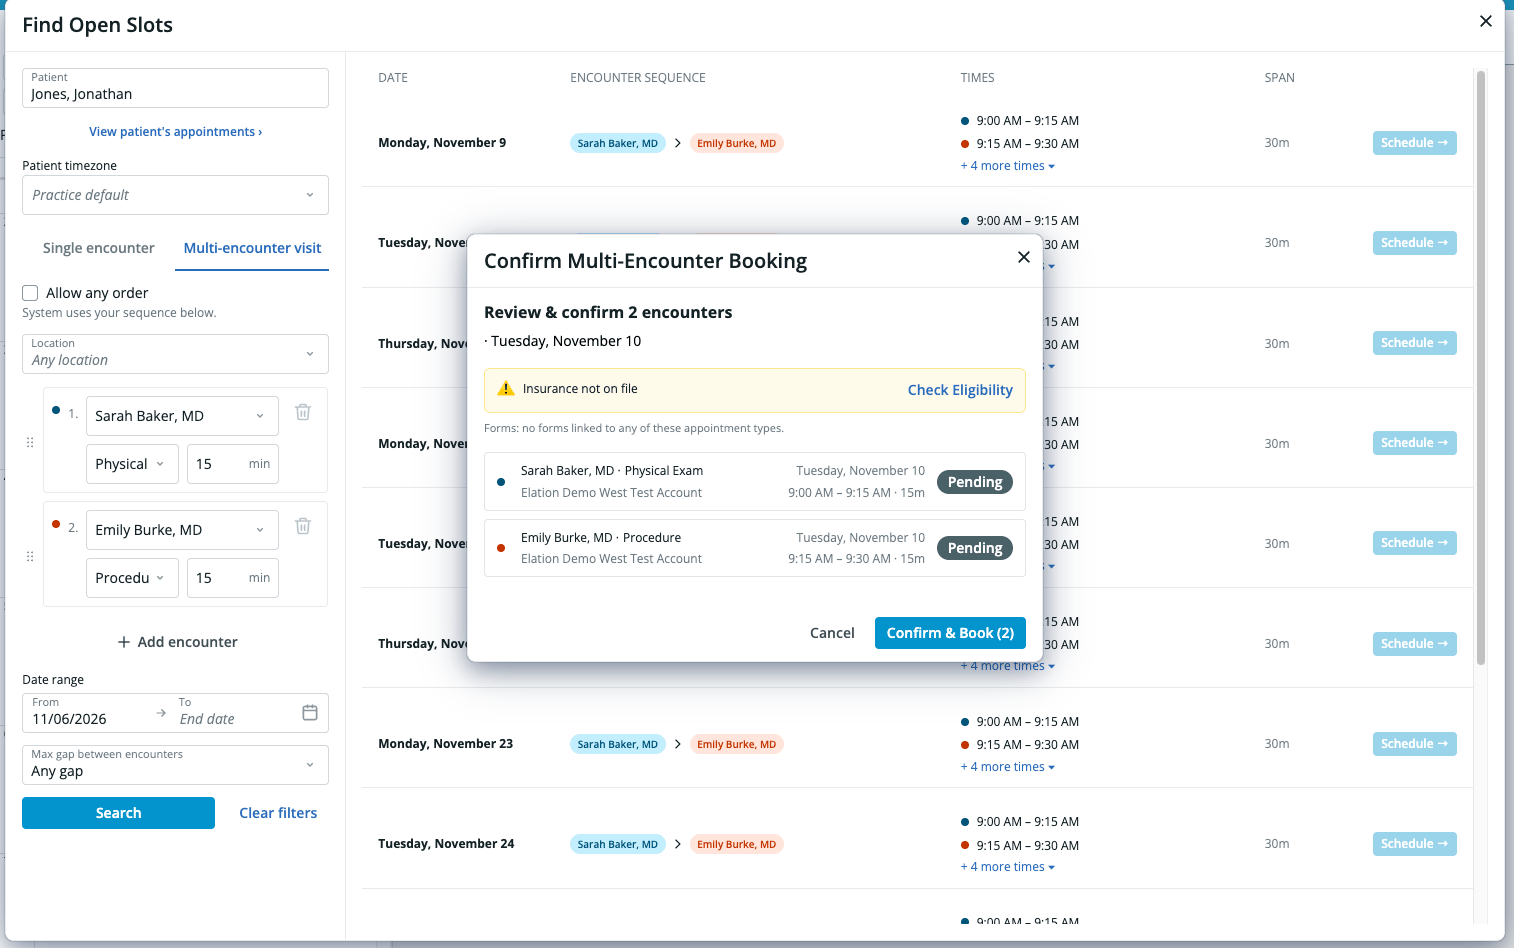
- On Confirm Multi-Encounter Booking, review each encounter. Choose an appointment type for any encounter that does not have one. If you want to add details to an encounter, such as visit instructions, click Edit on that encounter. This step is optional. See Edit an encounter’s details. You can also continue without adding any details.
- Review the alerts on the screen:
- Insurance: Elation shows the patient’s insurance and copay when it has them. Click Check Eligibility to verify coverage. If there is no insurance on file, Elation shows Insurance not on file.
- Forms: Elation lists the patient forms linked to each appointment type, or notes that no forms are linked.
- Billing alerts: Any billing alerts on the patient’s chart appear here.
- Reminders: Elation warns you when the patient has no phone or email on file (Can’t reach this patient) or has opted out of appointment reminders.
- Click Confirm & Book. The button shows how many encounters it will book.
Edit an encounter’s details
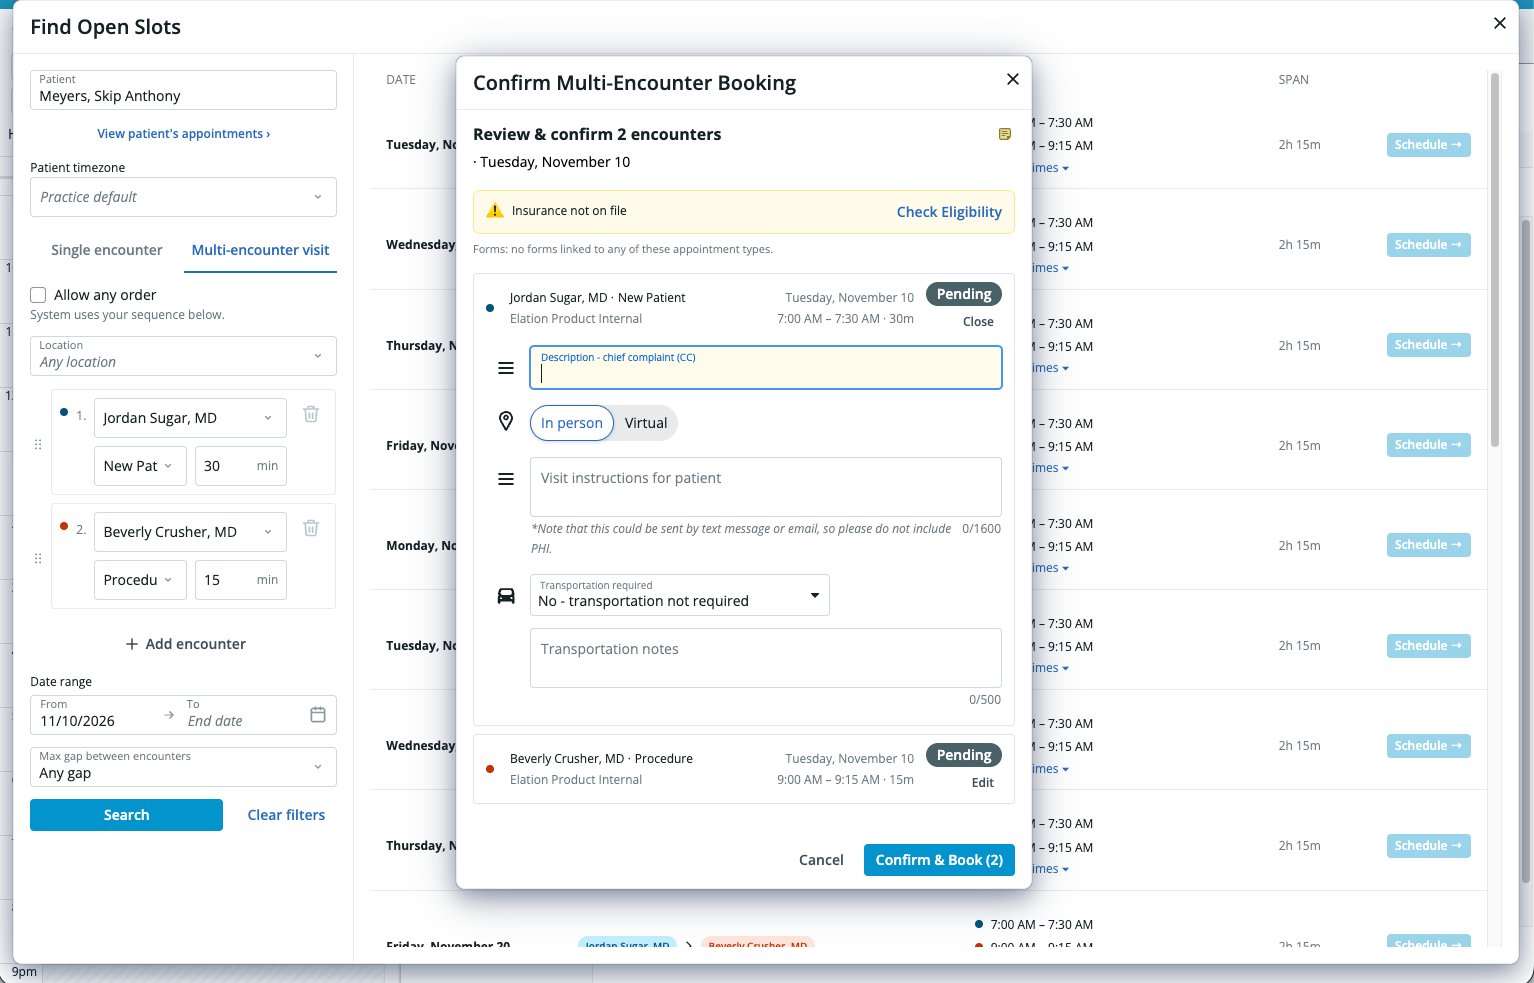
Editing an encounter is optional. Use it when you want to add information to an encounter, such as visit instructions or a chief complaint. If you do not need to add anything, skip this step and click Confirm & Book. Encounters you do not edit book with their default details.Editing encounter details is a Premium EHR feature and is currently in early access. If Edit does not appear on the encounters in Confirm Multi-Encounter Booking, you can request it. Click I need help > Contact Elation Support and ask to have per-encounter editing turned on for your practice. If you are not yet a Premium EHR customer, click the I need help button to notify Elation and a member of the Elation Team will reach out to assist you.
- Description - chief complaint (CC): The chief complaint for the encounter. It carries into the visit note, as it does for any appointment.
- In person or Virtual: Choose how the patient attends. Switching an encounter to virtual fills in the provider’s default telehealth instructions. Changing an encounter’s appointment type sets in person or virtual to that type’s default, unless you already chose a value yourself.
- Visit instructions for patient: Instructions the patient sees with the appointment. Visit instructions can be sent by text message or email, so do not include PHI.
- Transportation required and Transportation notes: If your practice tracks transportation, choose whether the patient needs it for each encounter, such as No - transportation not required, and add any notes.
- Patient Payment, Billing Note, Prior authorization, and Referring provider: These appear only if your practice uses these fields in the standard appointment dialog.
Required details
Elation checks every encounter before it books anything, including encounters whose editor you never opened. If any encounter is missing a required detail, no encounters are booked. Instead:- The encounter shows a Details required badge and the message Complete the required details for this encounter.
- The editor for the first encounter that needs attention opens so you can fix it.
If an encounter does not book
Elation books each encounter in order. If one fails, the encounters already booked stay on the Calendar.- A time is no longer available: Someone else booked it first. Close the confirmation screen, then click Search again in Find Open Slots to see the latest availability with the same parameters. Elation does not re-create encounters that are already booked.
- Another error: Click Retry booking to try the remaining encounters again.