Overview
Elation EHR + Billing Practices will use the EHR Calendar instead of the Elation Billing Calendar. This article applies to Legacy practices only.
Workflow Instructions
Accessing the Waiting Room
- Navigate - Click on the Appointment Calendar option under the Patients drop-down menu.
-
Open Waiting Room - Click on Waiting Room.

-
Take Action - Manage your waiting room appointments.
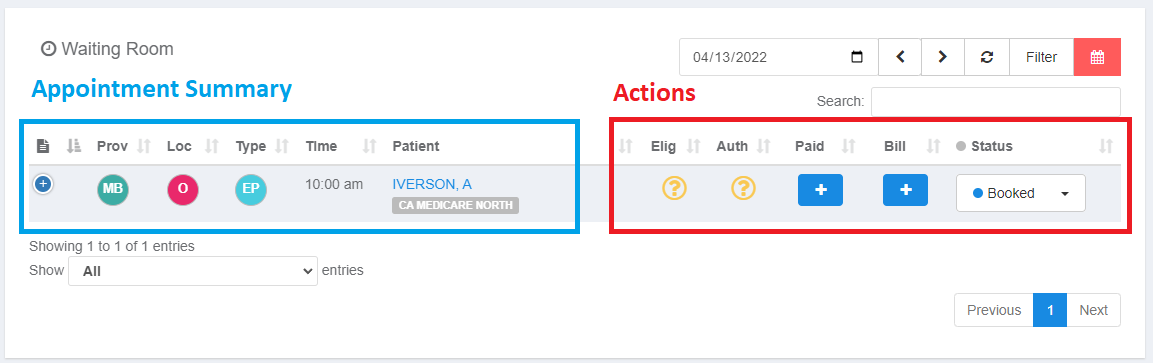
Available Actions
Run Eligibility
The status icon is displayed based on eligibility ran from the start of the month up until the appointment date. Click the icon to run eligibility.Authorization
Does this appointment need pre-auth/referral? Click the icon to mark as No Auth Needed or choose an Auth to attach to this visit (Auth will be attached when you capture charges).Paid
Does this patient have a copay? Click the icon to mark as No Payment Needed or choose to record a payment or take a new credit card.Bill
Do this last. Click the icon to mark as No Charges or choose to capture charges, which will create a new superbill automatically. All that’s left is to add CPT and DX Codes and Lightning Bill.Superbill will be added to the worklist with tag “Biller Review”.