
Overview
Understanding Scheduling Privileges for Providers and Staff
Before setting up your calendar, it’s helpful to understand how scheduling-related privileges differ between Provider Level Users and Staff Level Users.Calendar ownership and default views
- Only Provider Level Users have their own Calendar in Elation. The exception is a resource or team calendar, a non-provider scheduling calendar that Elation Support can set up for a practice to book patients on a role or resource rather than a specific provider.
- If you are a Provider Level User, the Calendar will always default to showing your own Calendar.
- If you are a Staff Level User in a multi-provider practice, the Calendar will default to showing the Calendar for the provider you set as your Default physician under Settings >> User Settings. If you have not set a Default physician, the Calendar will default to the first provider alphabetically by first name.
- If the practice has only one Provider Level User, the Calendar will always default to showing that provider’s Calendar for all users.
- If your practice uses Workspaces, you may not see certain provider calendars depending on your Workspace configuration. See the Workspaces and scheduling visibility section below for details.
Telehealth visit privileges
- Regular Providers, Non-Prescribing Providers, and Limited Use Providers can activate and use the telehealth Zoom feature.
- On Call Providers cannot activate the telehealth Zoom feature themselves, but they can start virtual visits from a Regular or Non-Prescribing Provider’s calendar.
- Staff Level Users can start virtual visits from a Regular or Non-Prescribing Provider’s calendar but cannot activate the telehealth feature independently.
Premium EHR considerations
Premium EHR Users should review the sections below for more details about our specific features interact with appointments and their Calendars.How chart access controls affect appointment access
Your practice may use chart access controls that affect what users can do when viewing appointments.- Viewing appointments vs. opening charts: Staff members can view appointment times and details on the Calendar. However, if chart access restrictions are in place (such as VIP Charts or Patient Cohorts), they may not be able to open certain patient charts even if they can see the scheduled appointment. If your practice uses Workspaces, users may also be unable to see certain provider calendars. See the Workspaces and scheduling visibility section below for more information.
- VIP Charts: When a chart is marked as VIP, only the Provider assigned in practice can access it without restriction. Other users may see a warning or be blocked entirely, even if you can see their appointment on the Calendar.
- Patient Cohorts: Patient Cohorts allow practices to automatically restrict chart access based on patient criteria. If a patient is assigned to a cohort and you are not a member of that cohort, you may be unable to open the patient’s chart even if you can see their appointment on the Calendar.
- Block All Chart Access: Admin Level Users can revoke a user’s access to all patient charts. Users without chart access will see an Unauthorized access page when attempting to open any patient chart, but they will still be able to see the appointment on the Calendar.
Workspaces and scheduling visibility
If your practice uses the Workspaces feature, scheduling visibility may vary based on your Workspace configuration.People List and Calendar visibility
- The People List resource in Workspaces controls which Provider Level Users appear for selection when viewing Provider Calendars and scheduling appointments.
- By default, all Provider Level Users appear in the Calendar and appointments unless a specific User Group is selected in the People List settings.
- Providers will always have access to their own Calendars, regardless of Workspace settings.
Time zone display
- If you are using Workspaces, the availability displayed on your Calendar will reflect the time zone configured for your Workspace.
Switching between Workspaces to see related Calendars
- If you belong to multiple Workspaces, you can switch between them to see the related Calendars by clicking the Workspace dropdown next to your email in the blue navigation bar at the top of Elation.
- Admin Level Users can use the Return to practice view option to see all resources within the EHR regardless of Workspace membership.
 Admin User View
 For more details, see the Workspaces Introduction article.
Workflow Instructions
Accessing the Calendar Settings
The Elation Calendar settings is in Settings >> Calendar & Booking. The main calendar related sections here are Appointments, Calendar view, Reminders, and Rooms.Managing Appointment Types
Appointment types are the different appointment options you can utilize in the Elation Calendar. By default, Elation will load the following Appointment Types to new Elation accounts to start you off:- Follow-Up
- Office Visit
- Physical Exam
- Walk-in
- New Patient
- Procedure
Appointment types now open in an updated dialog with sections listed in a left-hand navigation menu — Appointment details, Auto-created visit note, Patient forms, and Booking site — instead of a single long scrolling panel. Click a section name to jump to it; the fields and options within each section are unchanged.The button layout has also moved: Save is now in the bottom-left corner of the dialog, and Delete is in the bottom-right, shown in red with a trash icon.
Creating a new appointment type
| 1 | Navigate to Settings. |
|---|---|
| 2 | Click Calendar and Booking in the Settings options. |
| 3 | Click Add Appointment Type. |
| 4 | Fill out the fields in each section, using the left-hand navigation to jump between Appointment details, Auto-created visit note, Patient forms, and Booking site. Each section has a short description under its heading explaining what it controls.  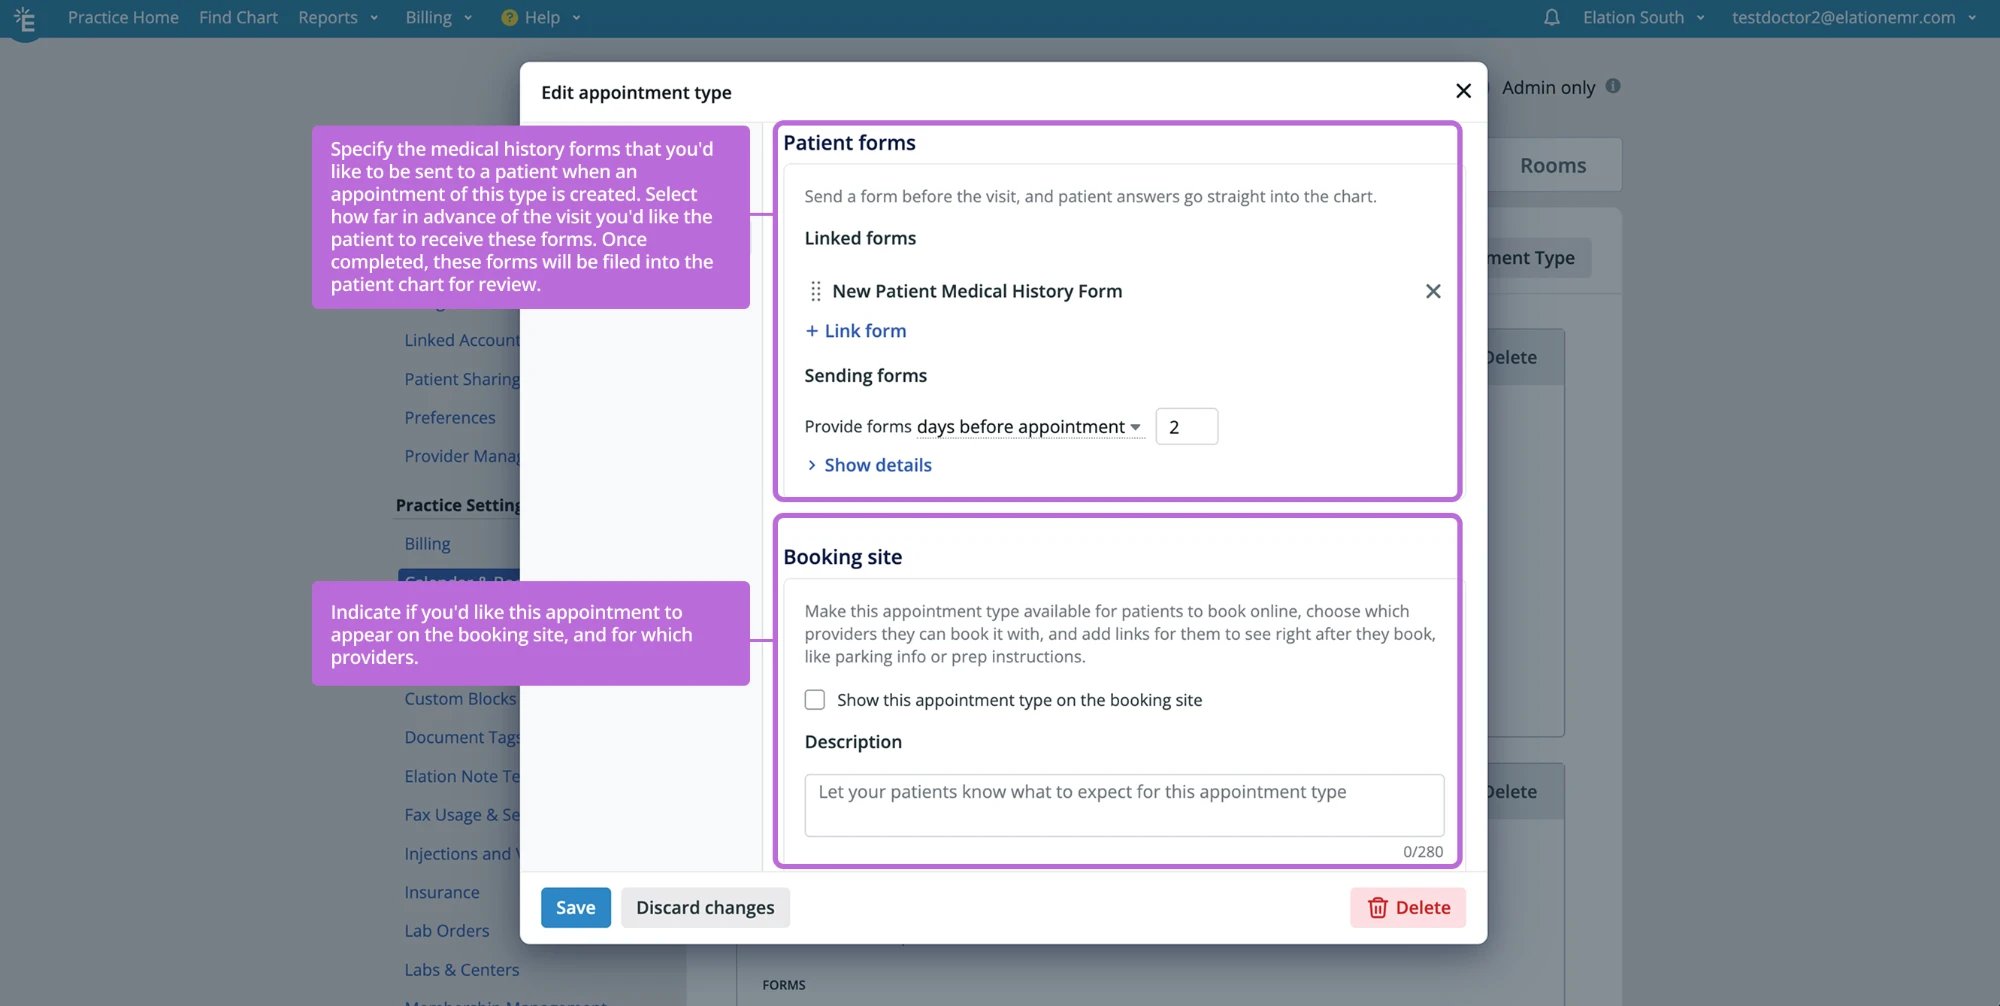 |
| 5 | Click Save. |
| 6 | Reload your Practice Home to allow your updates to display. |
Editing an existing appointment type
Removing an existing appointment type
| 1 | Open the appointment type you wish to remove, then click Delete (the red trash icon) in the bottom-right corner of the dialog. |
|---|---|
| 2 | In the confirmation, click Delete to confirm. 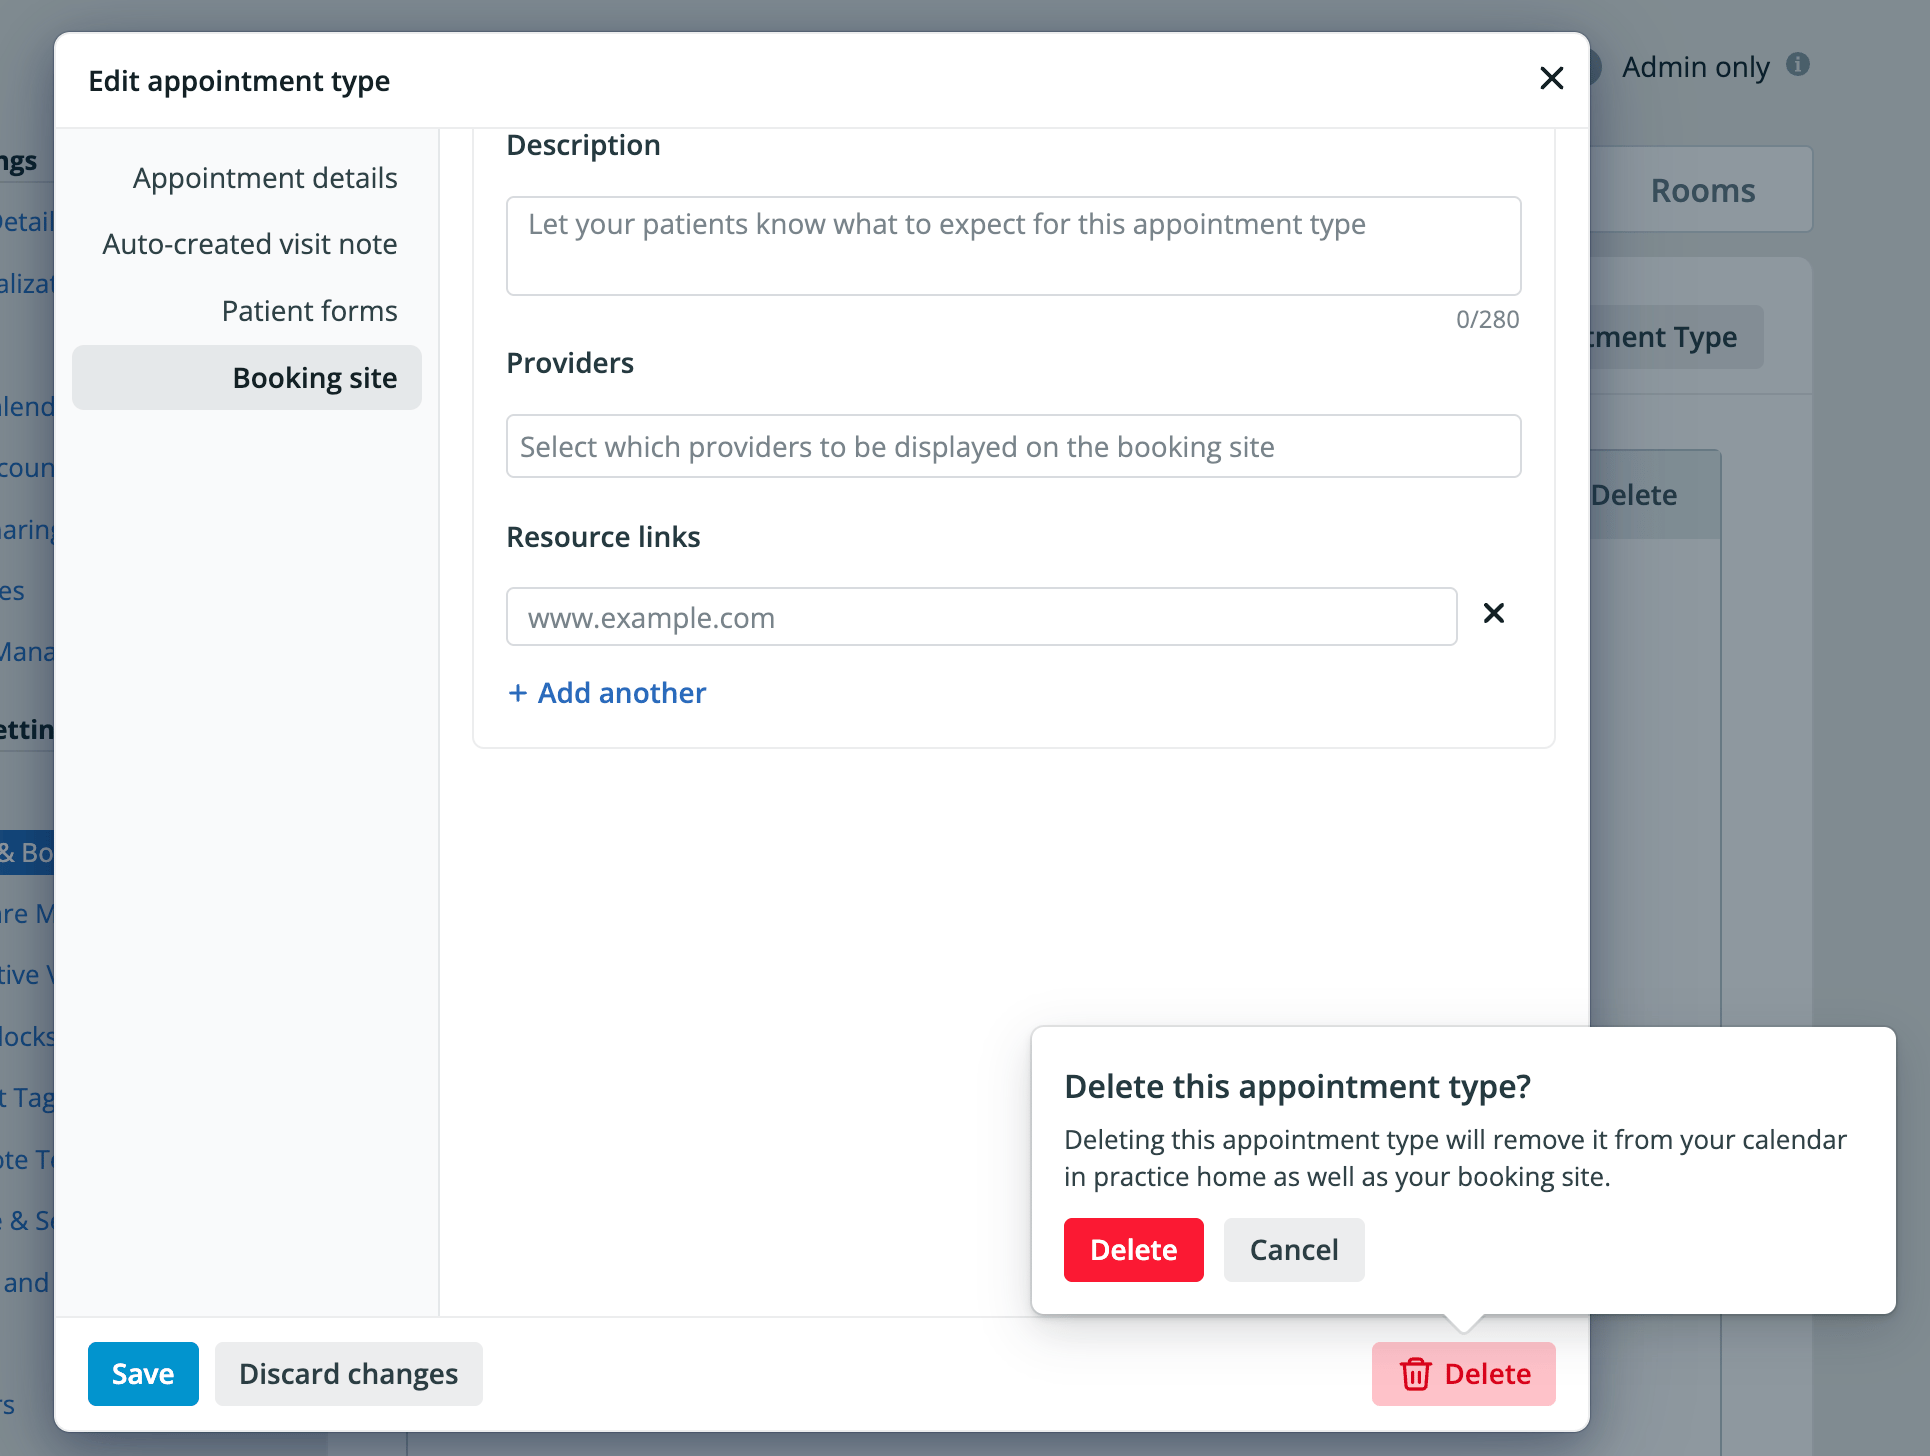 |
| 3 | Reload your Practice Home to allow your updates to display. |
Delete only appears when you are editing an existing appointment type, not when you are adding a new one. It is also unavailable when the practice has only one appointment type left, since your last remaining type can’t be deleted.
Sorting appointment types
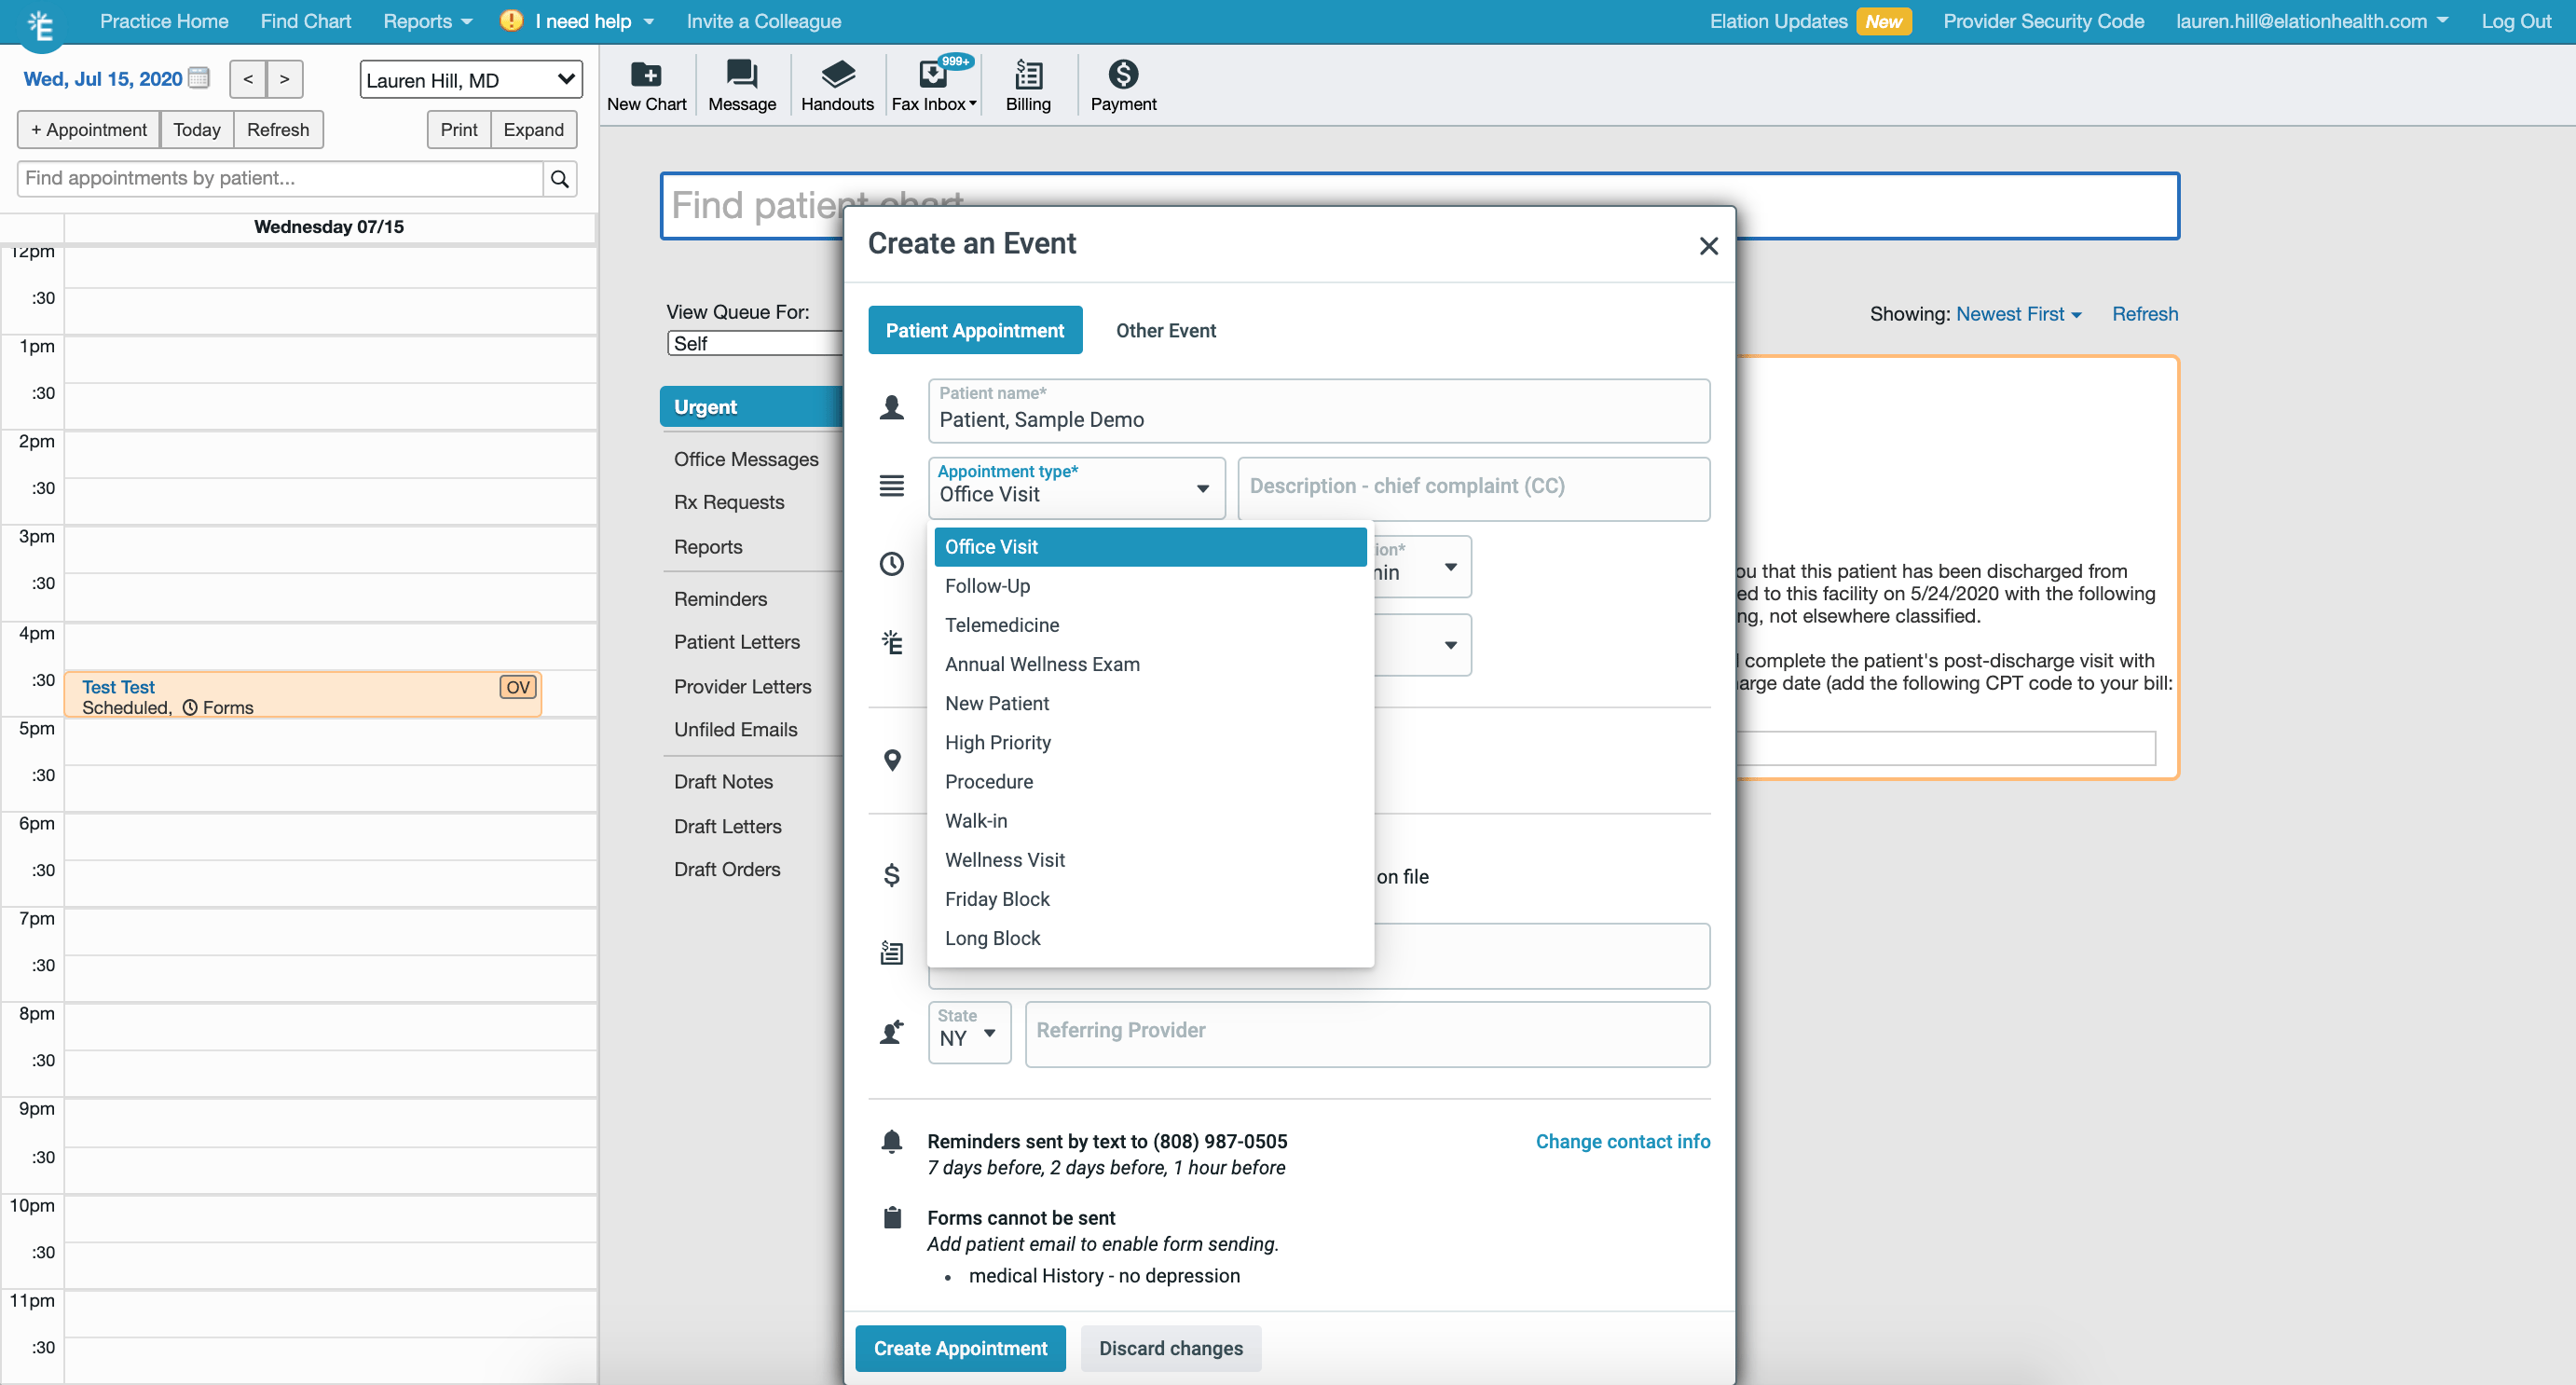
Click and drag the handle on the left hand side of the appointment type to re-order it. The order of your appointment types in Settings will be reflected in the Appointment type drop-down menu in the Create an Event window in the Elation calendar.
Managing the Calendar View
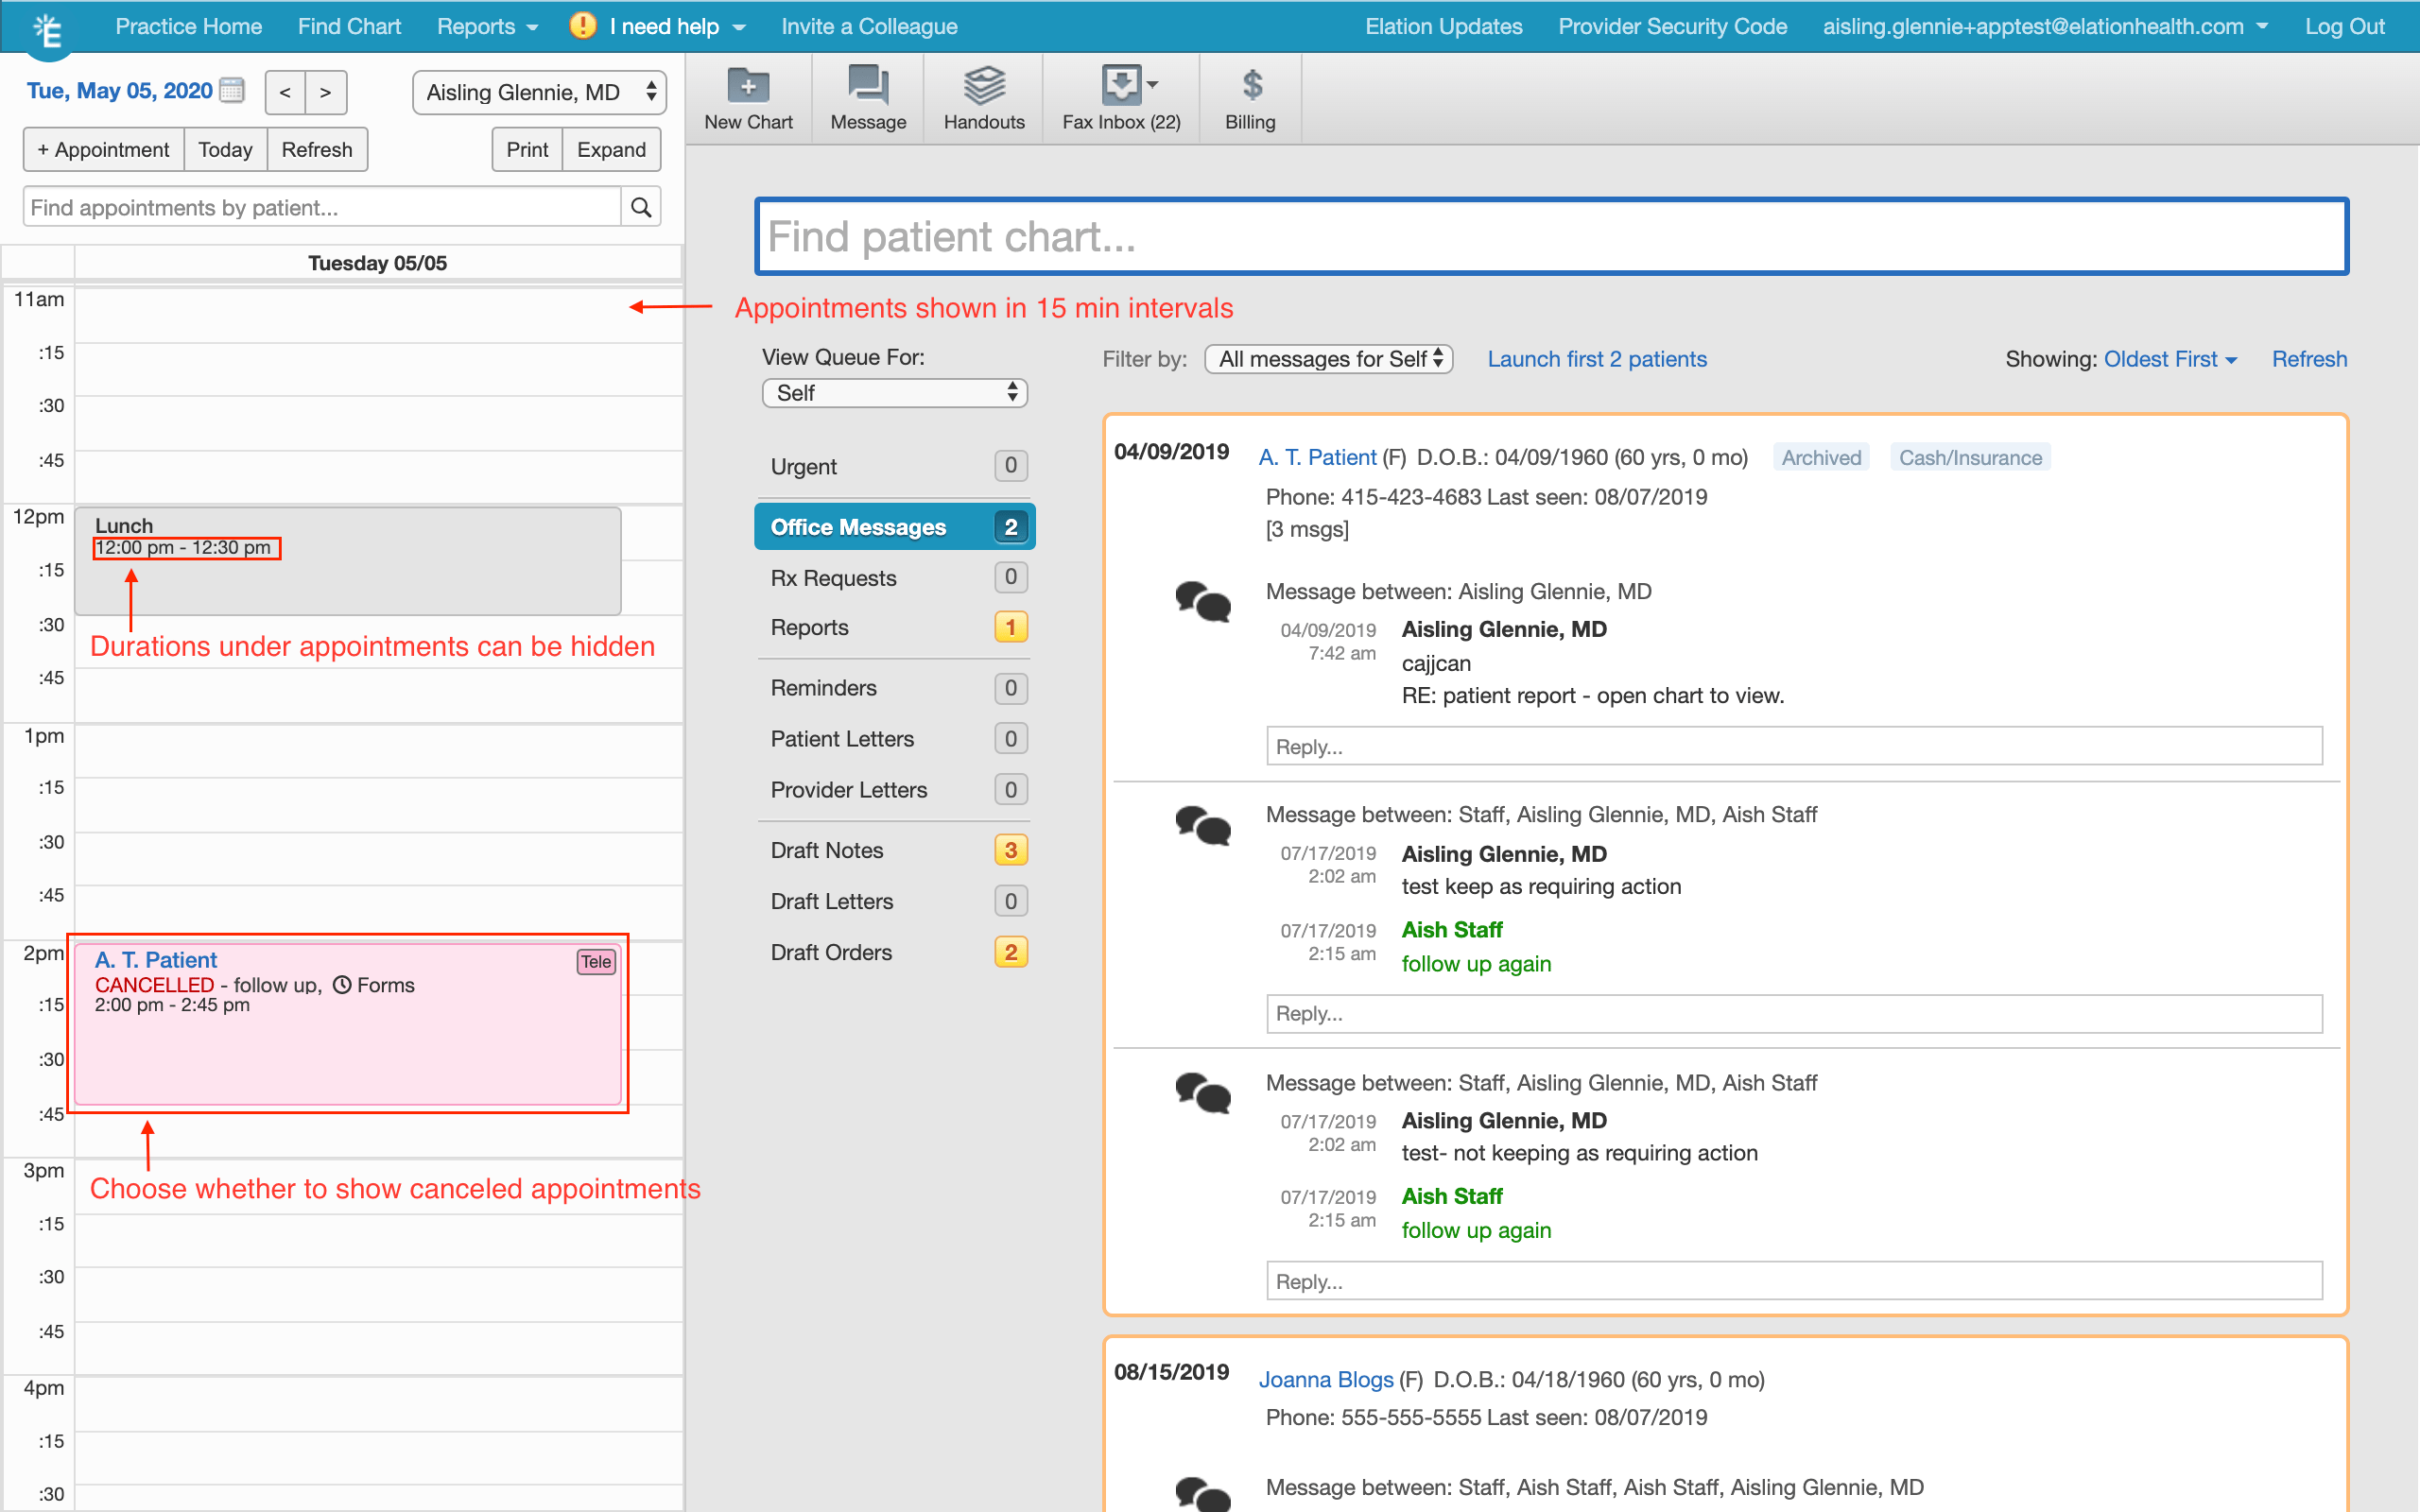
To edit the way your calendar displays information, go to the Calendar view tab under the Calendar & Booking settings page.- Time block intervals for calendar: Set the duration of the time block intervals shown on the internal Elation Calendar for everyone in your practice. For example, if you set the block interval at 15 minutes, the scheduler will display times throughout the day in 15-minute increments. Options are 5, 10, 15, 20, 25, 30, 45, and 60 minutes.
- Time block intervals for booking site: Set the interval between the appointment start times patients can pick on your Booking Site. Options are 5, 10, 15, 20, 25, 30, 45, and 60 minutes. This setting is independent of Time block intervals for calendar, so your internal calendar and your Booking Site can use different intervals. If this dropdown is left unset, the Booking Site falls back to the calendar interval.
- Hide the durations under the patients name on appointments and on events: If you wish to hide durations that show up on appointment and events, move the toggle to appear green.
- Show Canceled Appointments: If you wish to see canceled appointments in the calendar, move the toggle to appear green.
The start times patients see on the Booking Site are counted forward from the start of each provider’s availability block, not from the top of the hour. For a 20-minute Booking Site interval, an availability block that begins at 9:00 AM produces 9:00 / 9:20 / 9:40 start times, while a block that begins at 8:45 AM produces 8:45 / 9:05 / 9:25. If you want start times to land on specific minute marks (for example :00 / :20 / :40), set each provider’s availability block to begin on the hour under Settings → Calendar & Booking → Availability.
Managing Exam Rooms
To add, edit, and delete exam room names that you can use from the Elation Calendar, go to the Rooms section in the Calendar & Booking settings page. You will be able to select from your list of exam rooms after you select one of the In Room options for the appointment’s status.Creating a new exam room
Editing an existing exam room
Removing an existing exam room
Click Delete on the room that you wish to remove.Using automated Appointment Reminders
Your practice can choose to send up to 3 appointment reminders to patients ahead of a scheduled patient visit. Elation’s automated appointment reminders help ensure that your patients have the information they need to attend their visit and will decrease the number of no shows on your schedule. Our system uses the following logic to determine which notification to send:- Preferred contact method. If not, then:
- SMS Text to the mobile phone number. If not, then:
- Email notification to the email address. If not, then:
- Phone call to a home or main phone number.
Appointment reminder notifications cannot be sent to work, night, fax or other phone numbers.