Overview
How is the fax inbox organized?
Within your fax inbox, you’ll see a tab for your Elation fax line(s) and a tab labeled Unfiled Images (non-fax).- The fax line tab(s) will contain any inbound transmissions received by your Elation eFax number.
- The Unfiled Images tab will contain any reports that have been removed from a patient’s chart but are awaiting re-filing.
How do I transfer a document from the Fax Inbox to a patient’s chart?
Use the workflows below to learn how to transfer documents from any of the Fax tabs into the appropriate patient’s chart.Workflow Instructions
Queueing documents in preparation for filing
| 1 | Click the name of the document to expand a preview of its pages. |
|---|---|
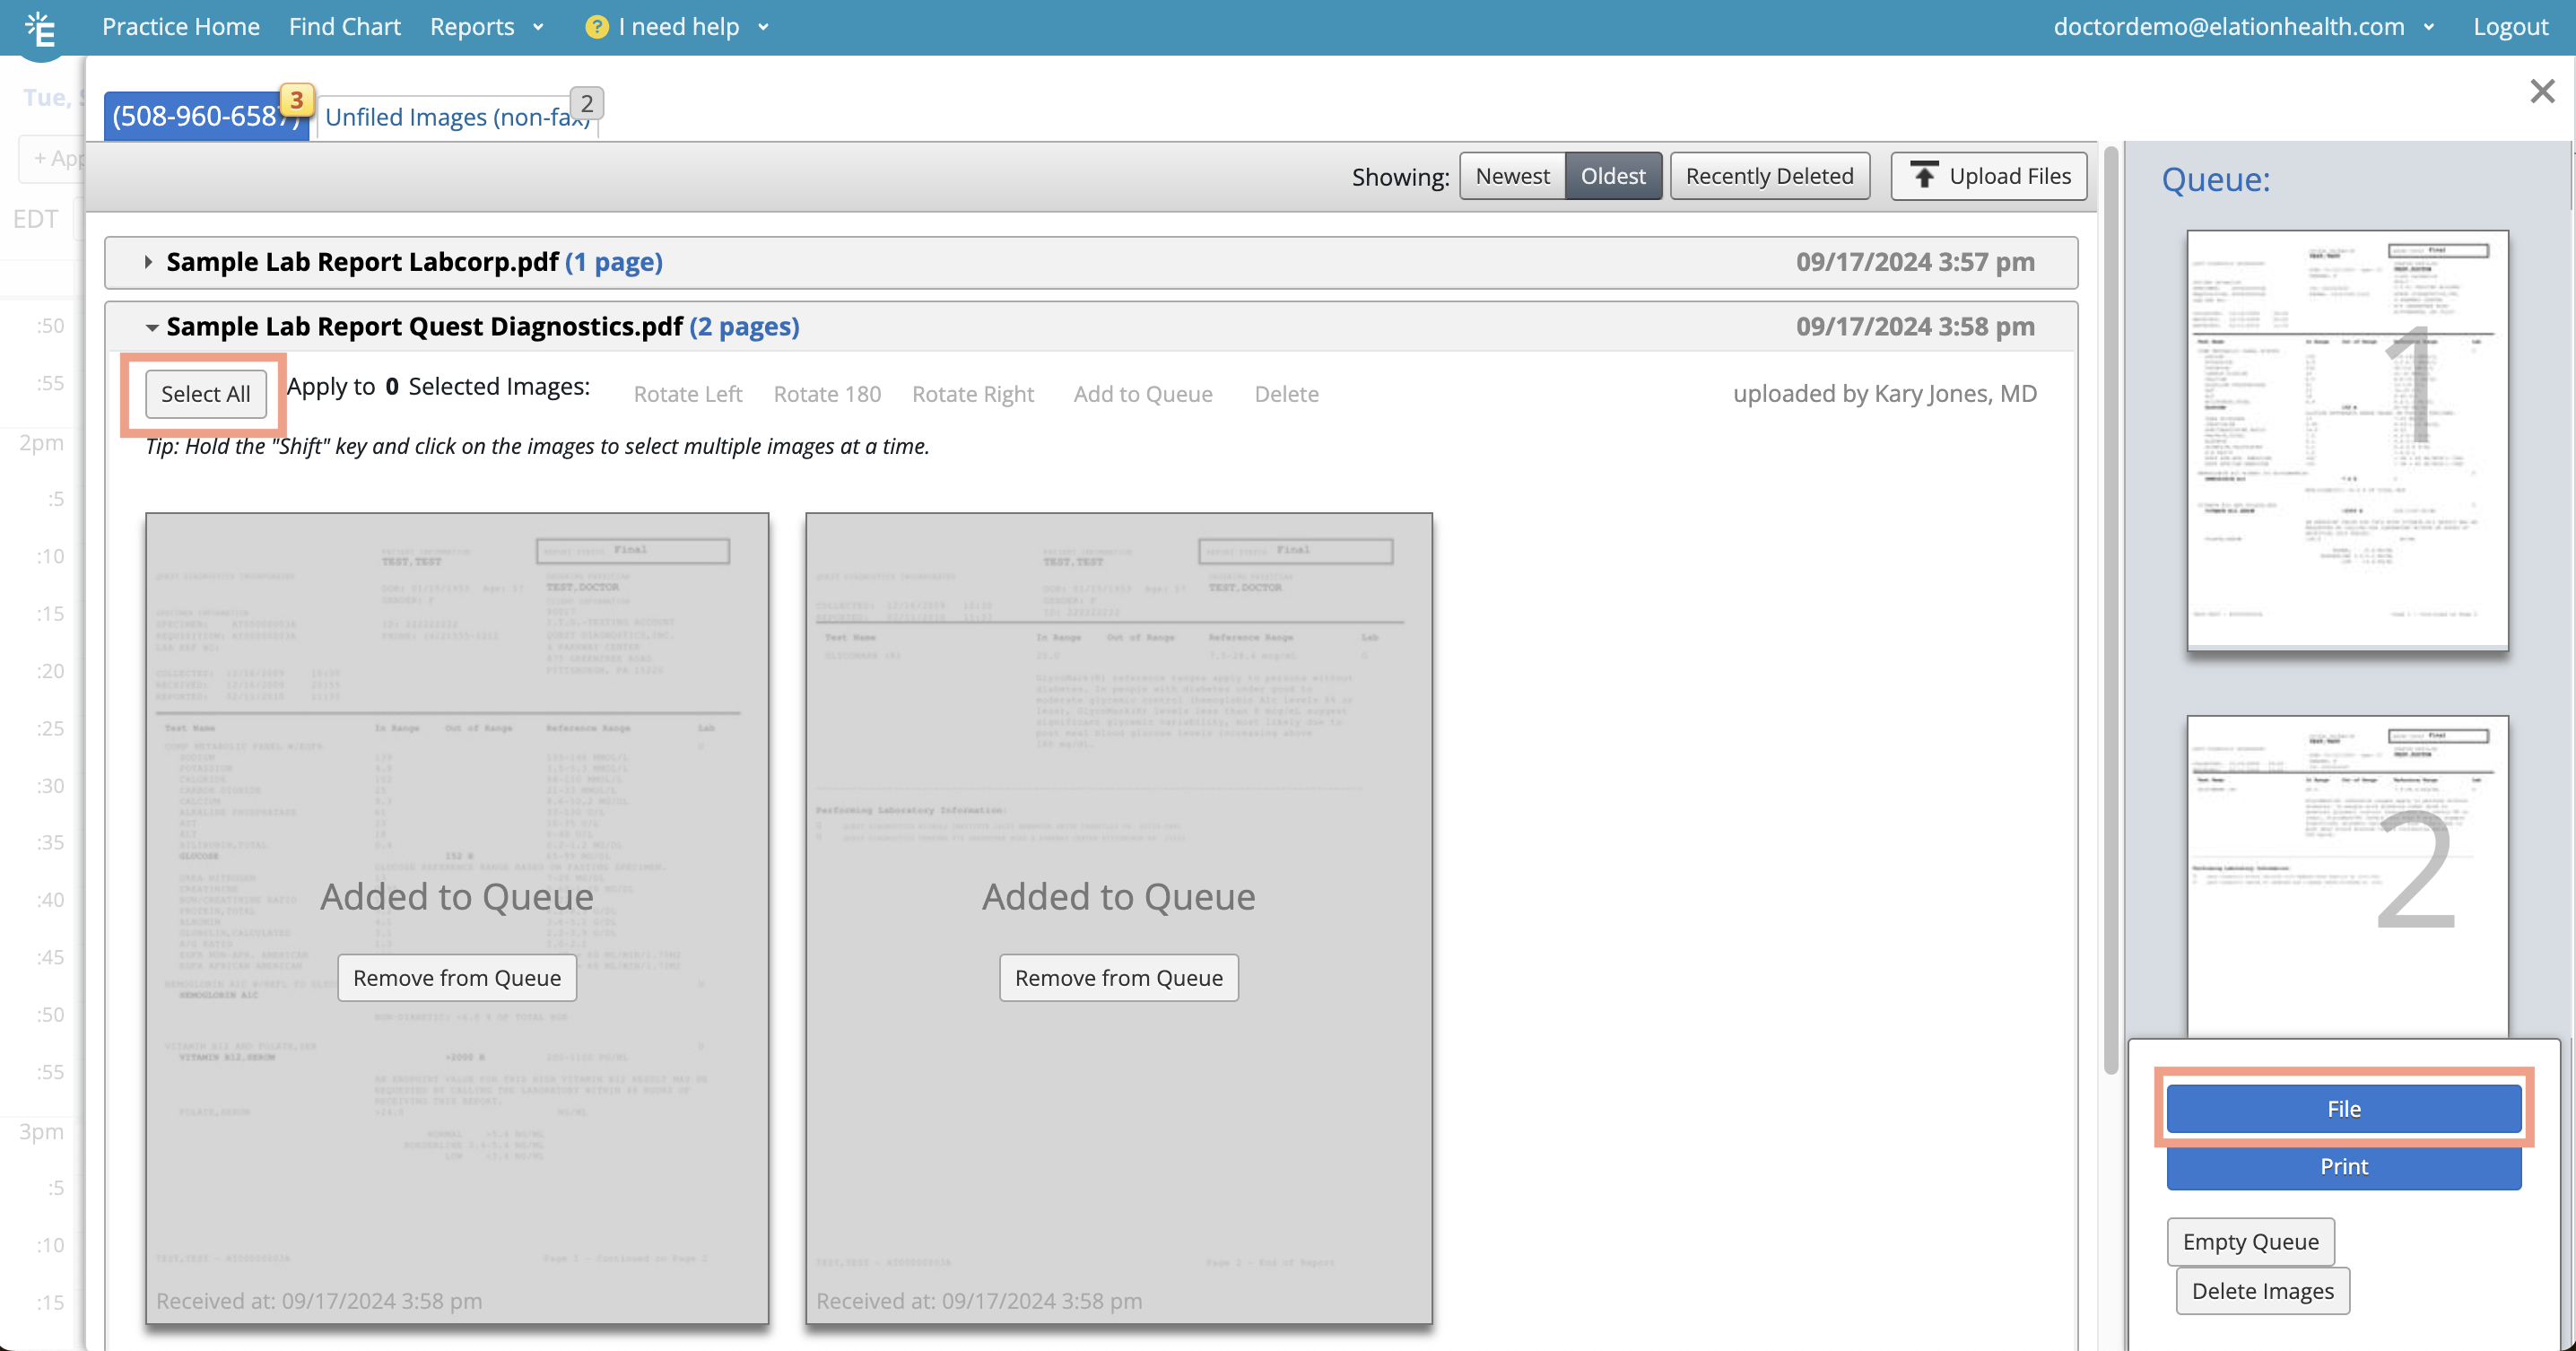
| 2 | Select all the pages of the document you want to file using one of the following methods: To select an individual page, click on the box in the upper left hand corner of each page preview . • To select all pages within the document, click Select all at the top of the document. |
| 3 | At the top of the document, click Add to Queue in the toolbar. You will see your selected pages appear on the right side of the Fax Inbox in the Queue section. Pages that have already been added to the Queue will become grayed out so that you know which pages have been selected. This effect also locks the pages for other users in your practice to block them from taking action on the pages you’re actively working on. |
| 4 | (Optional) Take any of the following actions within the Queue if needed: Change the order of the pages by dragging and dropping the page previews. • Click Print to print all pages in the Queue. • Click Empty Queue to release all pages from the Queue back into the fax inbox. • Click Delete Images to delete all pages from your fax inbox entirely. Use this button with caution. |
| 5 | Click File to continue to the next step. |
Filing a document to a patient’s chart
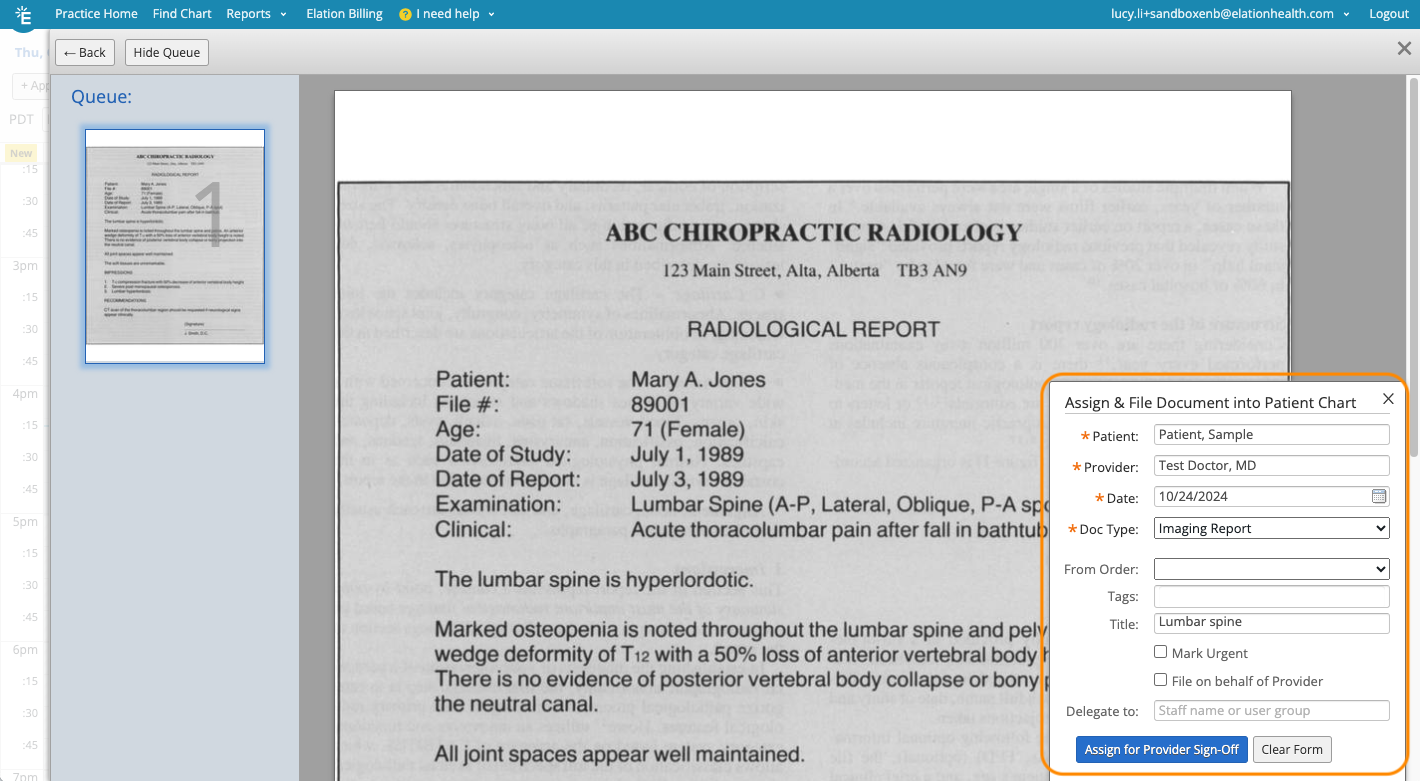
- Patient* - The patient the document belongs to.
- Provider* - The Provider responsible for reviewing, maintaining, and possibly signing the document.
- Date* - The date of the document.
- Document Type* - The type of report this document should be categorized as.
- Click here to learn more about Report Categories and how to adjust your Report Categories list.
- Tags - The document tag(s) you want to associate with the document.
- Title - The name of the document.
 5
To complete the filing workflow, take the action below that matches your use case:
5
To complete the filing workflow, take the action below that matches your use case:
- If File on behalf of reviewer was selected - click File Into Chart.
- The document won’t need to be signed; it’ll be added directly to the Chronological Record of the patient’s chart.
- If you specified a delegate - click Assign for Delegate Sign-off.
- The document will appear in the staff/staff user group’s Reports queue and require sign-off.
- If neither of the above apply - click Assign for Sign-off.
- The document will appear in the Reports queue of the provider whose name was inputted earlier in the form. It will need to be signed.
Contact Support to request the Delegate to Staff feature.To delegate sign-off to more than one Staff Level User, you must first create a User Group that includes all staff who are delegates and then input this User Group into the Delegate to field.
- The document appears in the assigned provider’s or staff delegate’s Reports queue in Practice Home.
- The document also appears in the Requiring Action section of the patient’s chart until signed off.
Reviewing assigned documents
If you see any reports in the Reports inbox of your Practice Home, this means the report has been assigned to you for review and sign off. To review and sign the assigned reports:- Click on the patient’s name to open their chart.
- Review the report in the Requiring Action section at the top of the chart.
- Click Sign Off if you’re a Provider Level User or Sign off on behalf of provider if you’re a Staff Level User.
Frequently Asked Questions
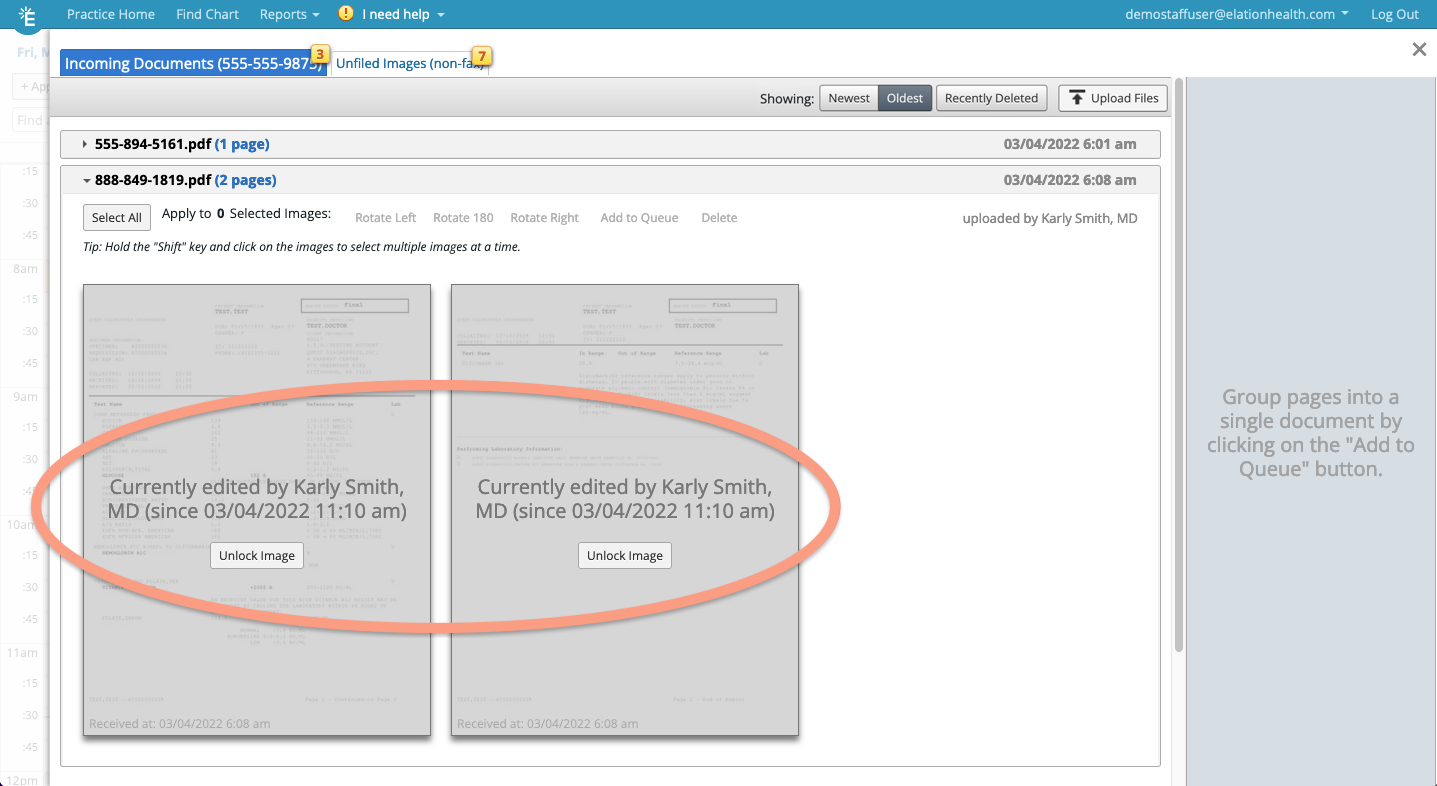
If multiple people are operating in the Fax Inbox, can someone else take action on the same pages that I’m filing?
When you add pages to the filing queue, other users in the Fax Inbox will see those pages as locked images. This experience will deter others from taking conflicting action on pages that are already being processed. If a user wishes to take action on a locked image, they must first click Unlock Image.