Overview
How to add documents to a patient’s chart
There are three ways to add documents to a patient’s chart- File documents from the Fax Inbox.
- Upload documents (e.g. PDF, .JPEG, .PNG, .doc, .xls) directly within the patient’s chart using the drag-and-drop feature.
- Upload documents directly within the patient’s chart by selecting More > Upload file to chart.
When to use the drag-and-drop feature
The drag-and-drop feature comes in handy when you have documents on your computer that you would like to upload to a patient’s chart. You can only use the drag-and-drop feature to upload one document at a time. If you need to upload multiple documents, you will need to take the drag-and-drop steps multiple times. If dragging a file onto the chart isn’t working for you, select More > Upload file to chart instead. It opens the same File Document into Chart window and files the document in exactly the same way, so you can use whichever method you prefer.On an iPad, use More > Upload file to chart. Dragging a file onto the chart is not reliable in iPadOS browsers.
- If you need to combine multiple documents into one record in the chart
- If a single document contains records for more than one patient
Workflow Instructions
Uploading files to the patient’s chart using the drag-and-drop feature
1
Find the document
Find the document (e.g. PDF, .JPEG, .PNG, .doc, .xls) you want to file into your patient’s chart on your computer.
2
Drag and drop the file onto the chart
Click on the file from the folder on your computer, hold down on your mouse cursor and drag the file anywhere over the patient’s chart in Elation and release your mouse cursor to drop the file. 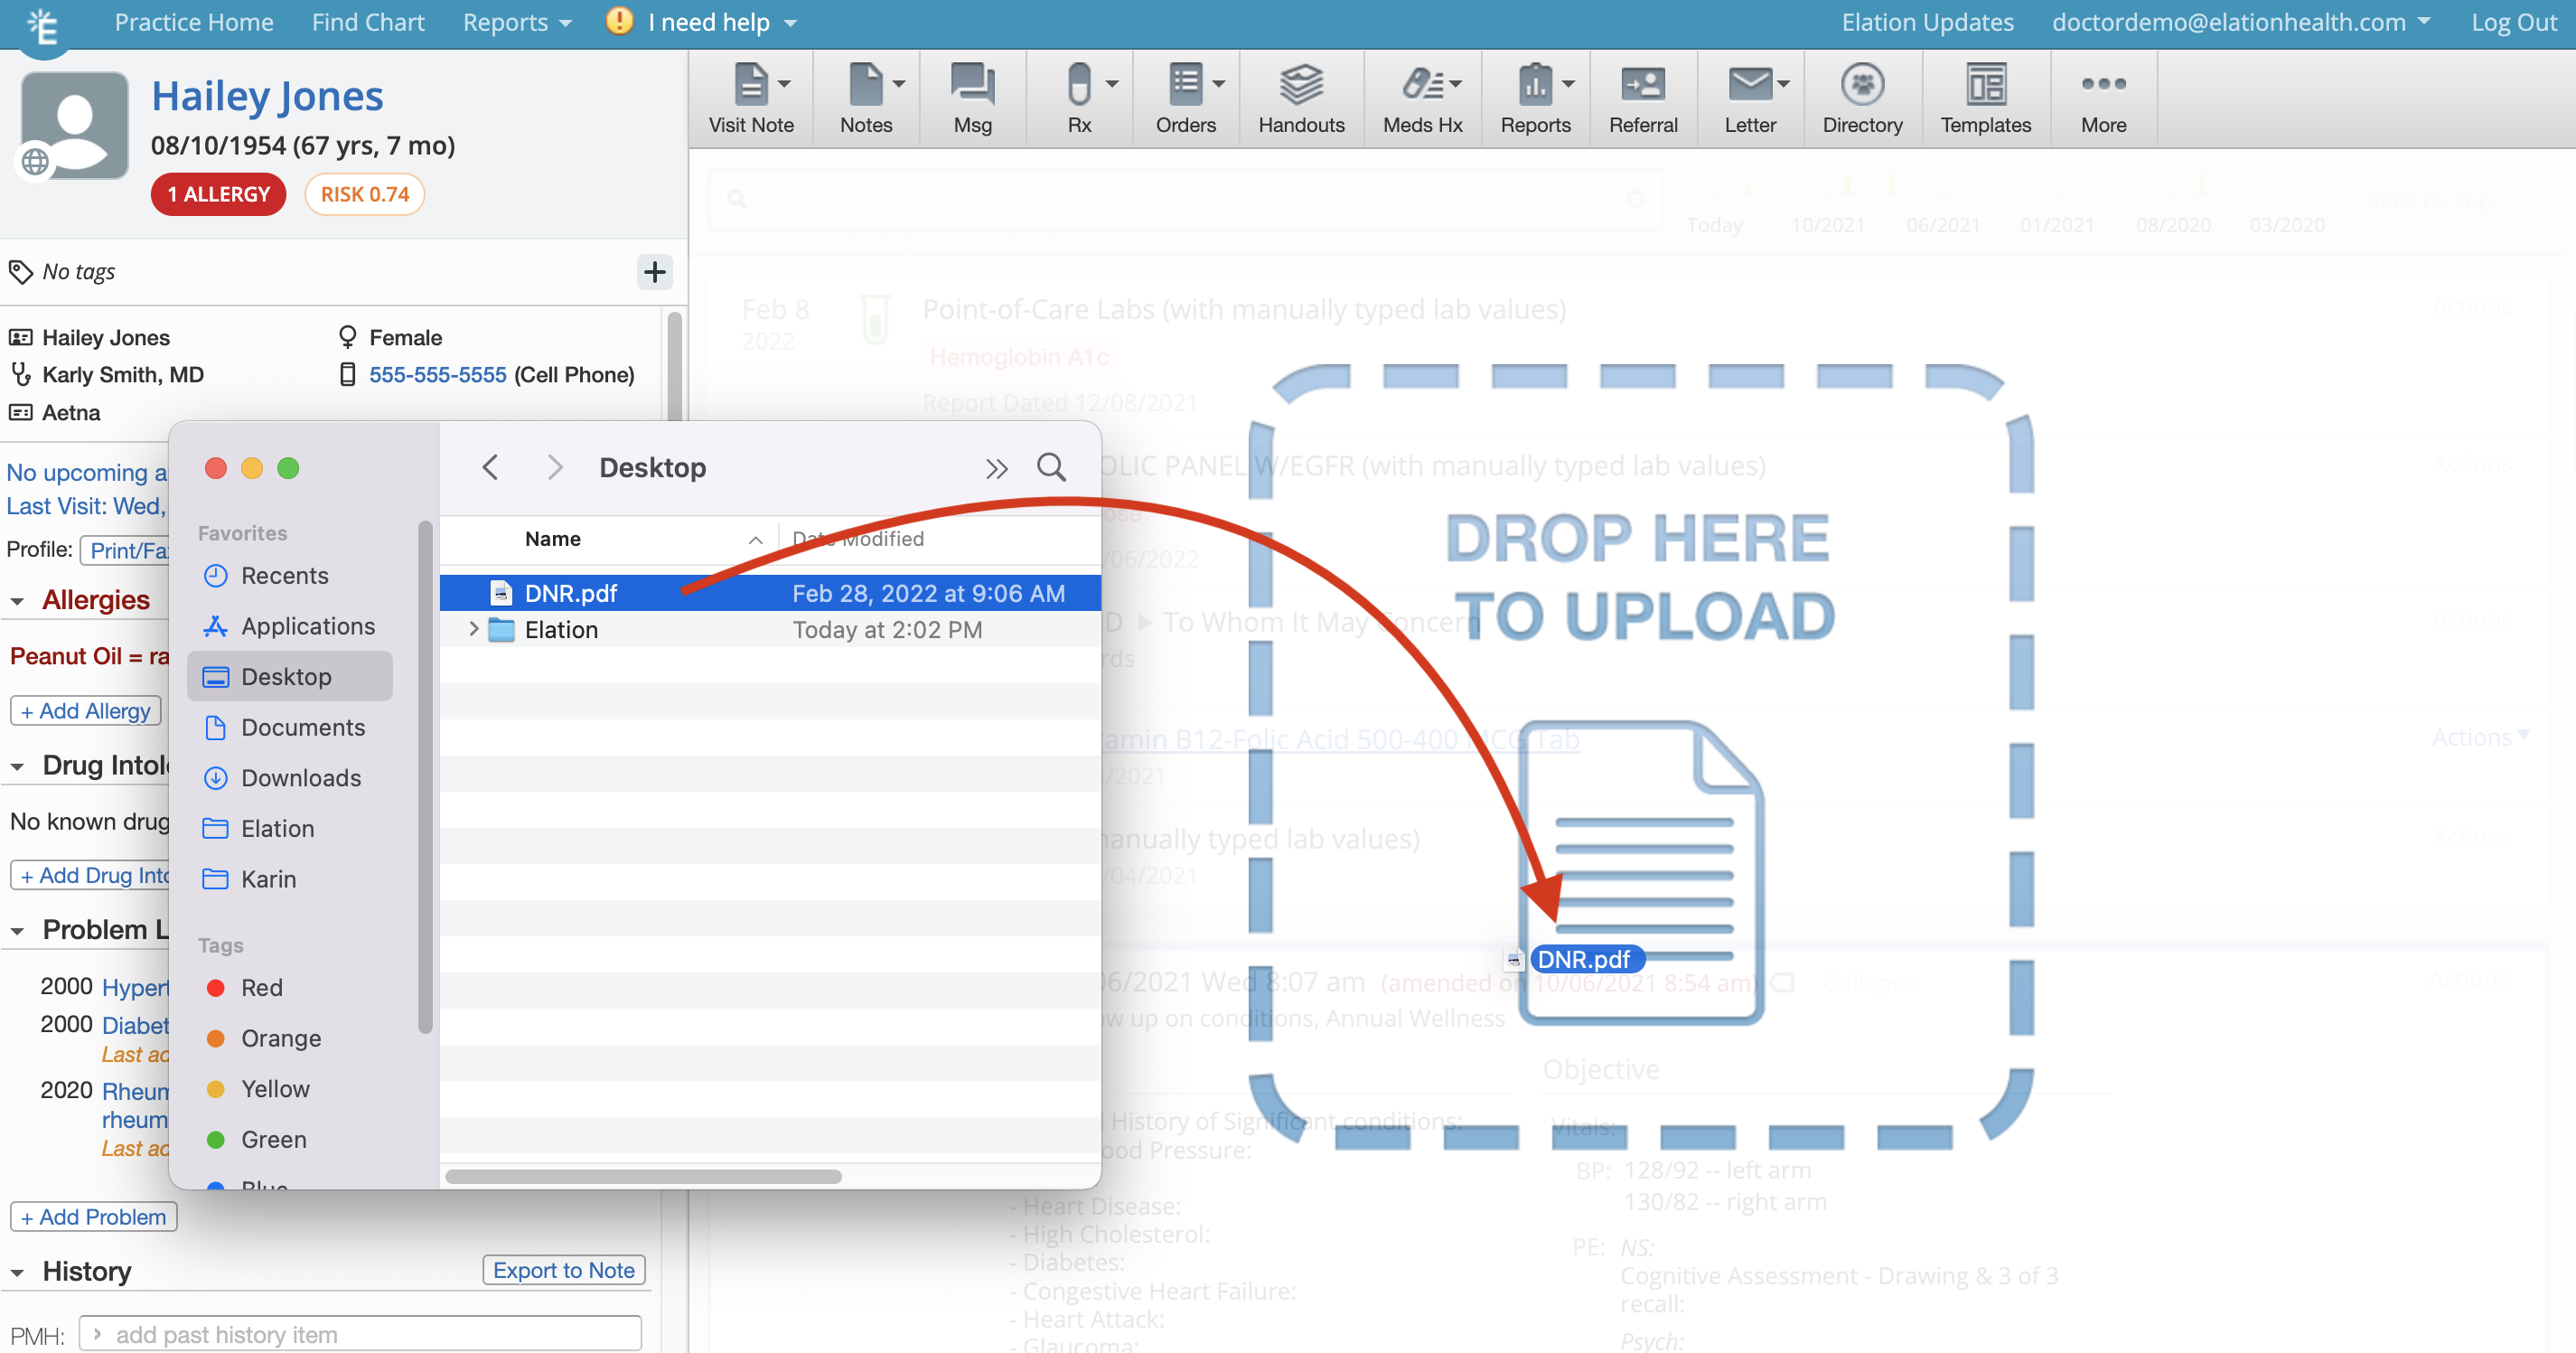
3
Fill out the document details
Fill out the reviewer’s name, date of document, select the document type ( Report Category ) and add a title and/or report tags if desired. The Reviewer field only lists Provider Level Users, so select the provider you want associated with the document even if it doesn’t require clinical review.
4
Upload the file
Click Upload File when you are ready to upload the document. 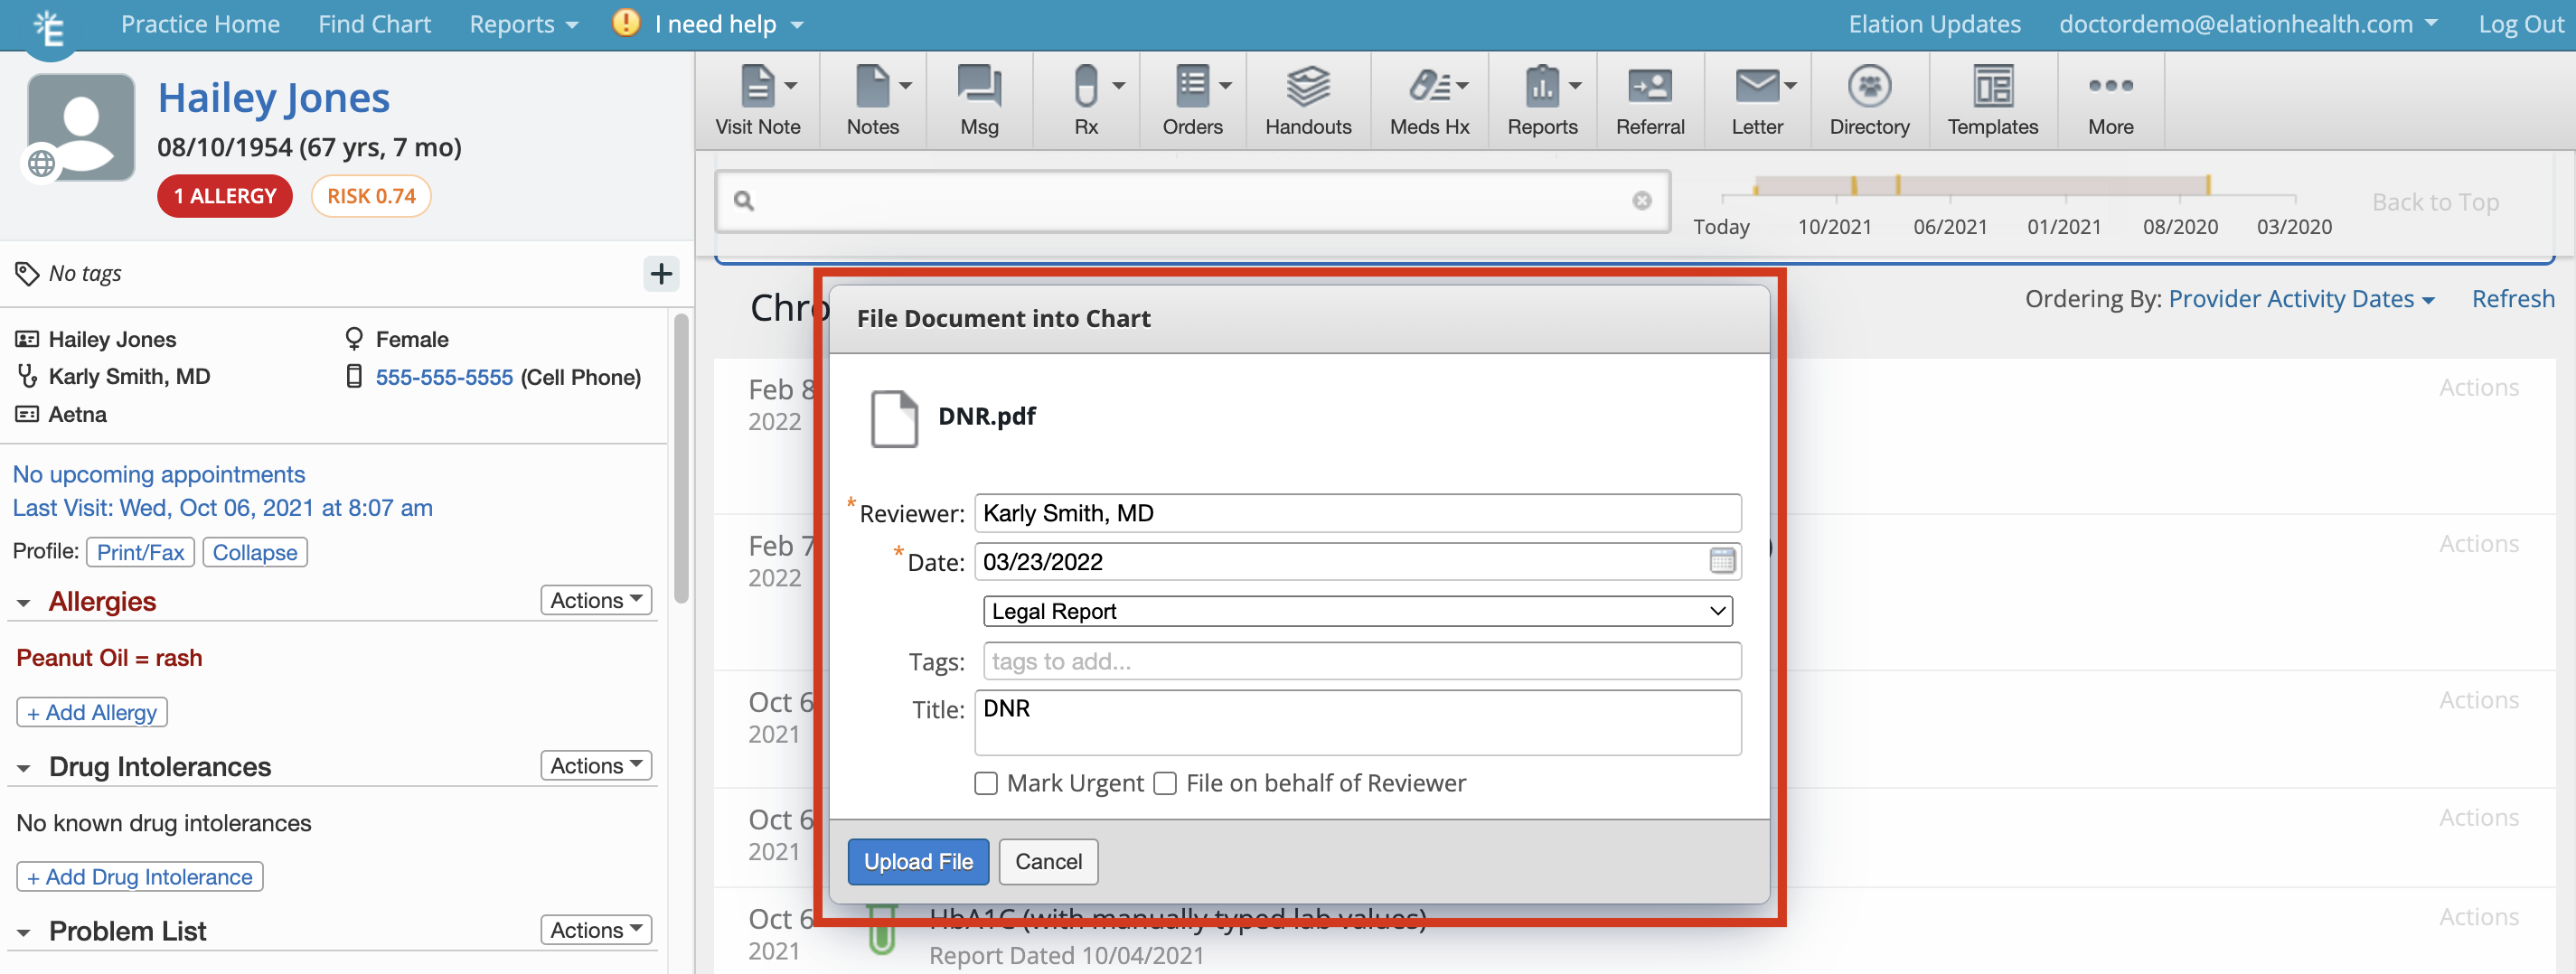
5
Wait for processing
Wait for the document to upload and process before moving or removing it from the original location on your computer or the upload will fail.
6
Check the Chronological Record
Once processed, the document will appear in the Chronological Record.
Uploading files to the patient’s chart using the More menu
1
Open the More menu
In the patient’s chart, click More in the toolbar at the top of the chart, then select Upload file to chart.
2
Choose the document
Your computer’s file selection window opens. Select the document (e.g. PDF, .JPEG, .PNG, .doc, .xls) you want to file into the chart. You can upload one document at a time.
3
Fill out the document details
The same File Document into Chart window opens as for drag-and-drop. Fill out the reviewer’s name, date of document, select the document type ( Report Category ) and add a title and/or report tags if desired. The Reviewer field only lists Provider Level Users, so select the provider you want associated with the document even if it doesn’t require clinical review.
4
Upload the file
Click Upload File when you are ready to upload the document.
5
Wait for processing
Once processed, the document will appear in the Chronological Record.
Uploading files to a visit note draft using the drag-and-drop feature
1
Find the document
Find the document (e.g. PDF, .JPEG, .PNG, .doc, .xls) you want to file into your patient’s chart on your computer.
2
Drag and drop the file onto the visit note
While a visit note draft is open, click on the file from the folder on your computer, hold down on your mouse cursor and drag the file anywhere over the visit note in Elation and release your mouse cursor to drop the file. 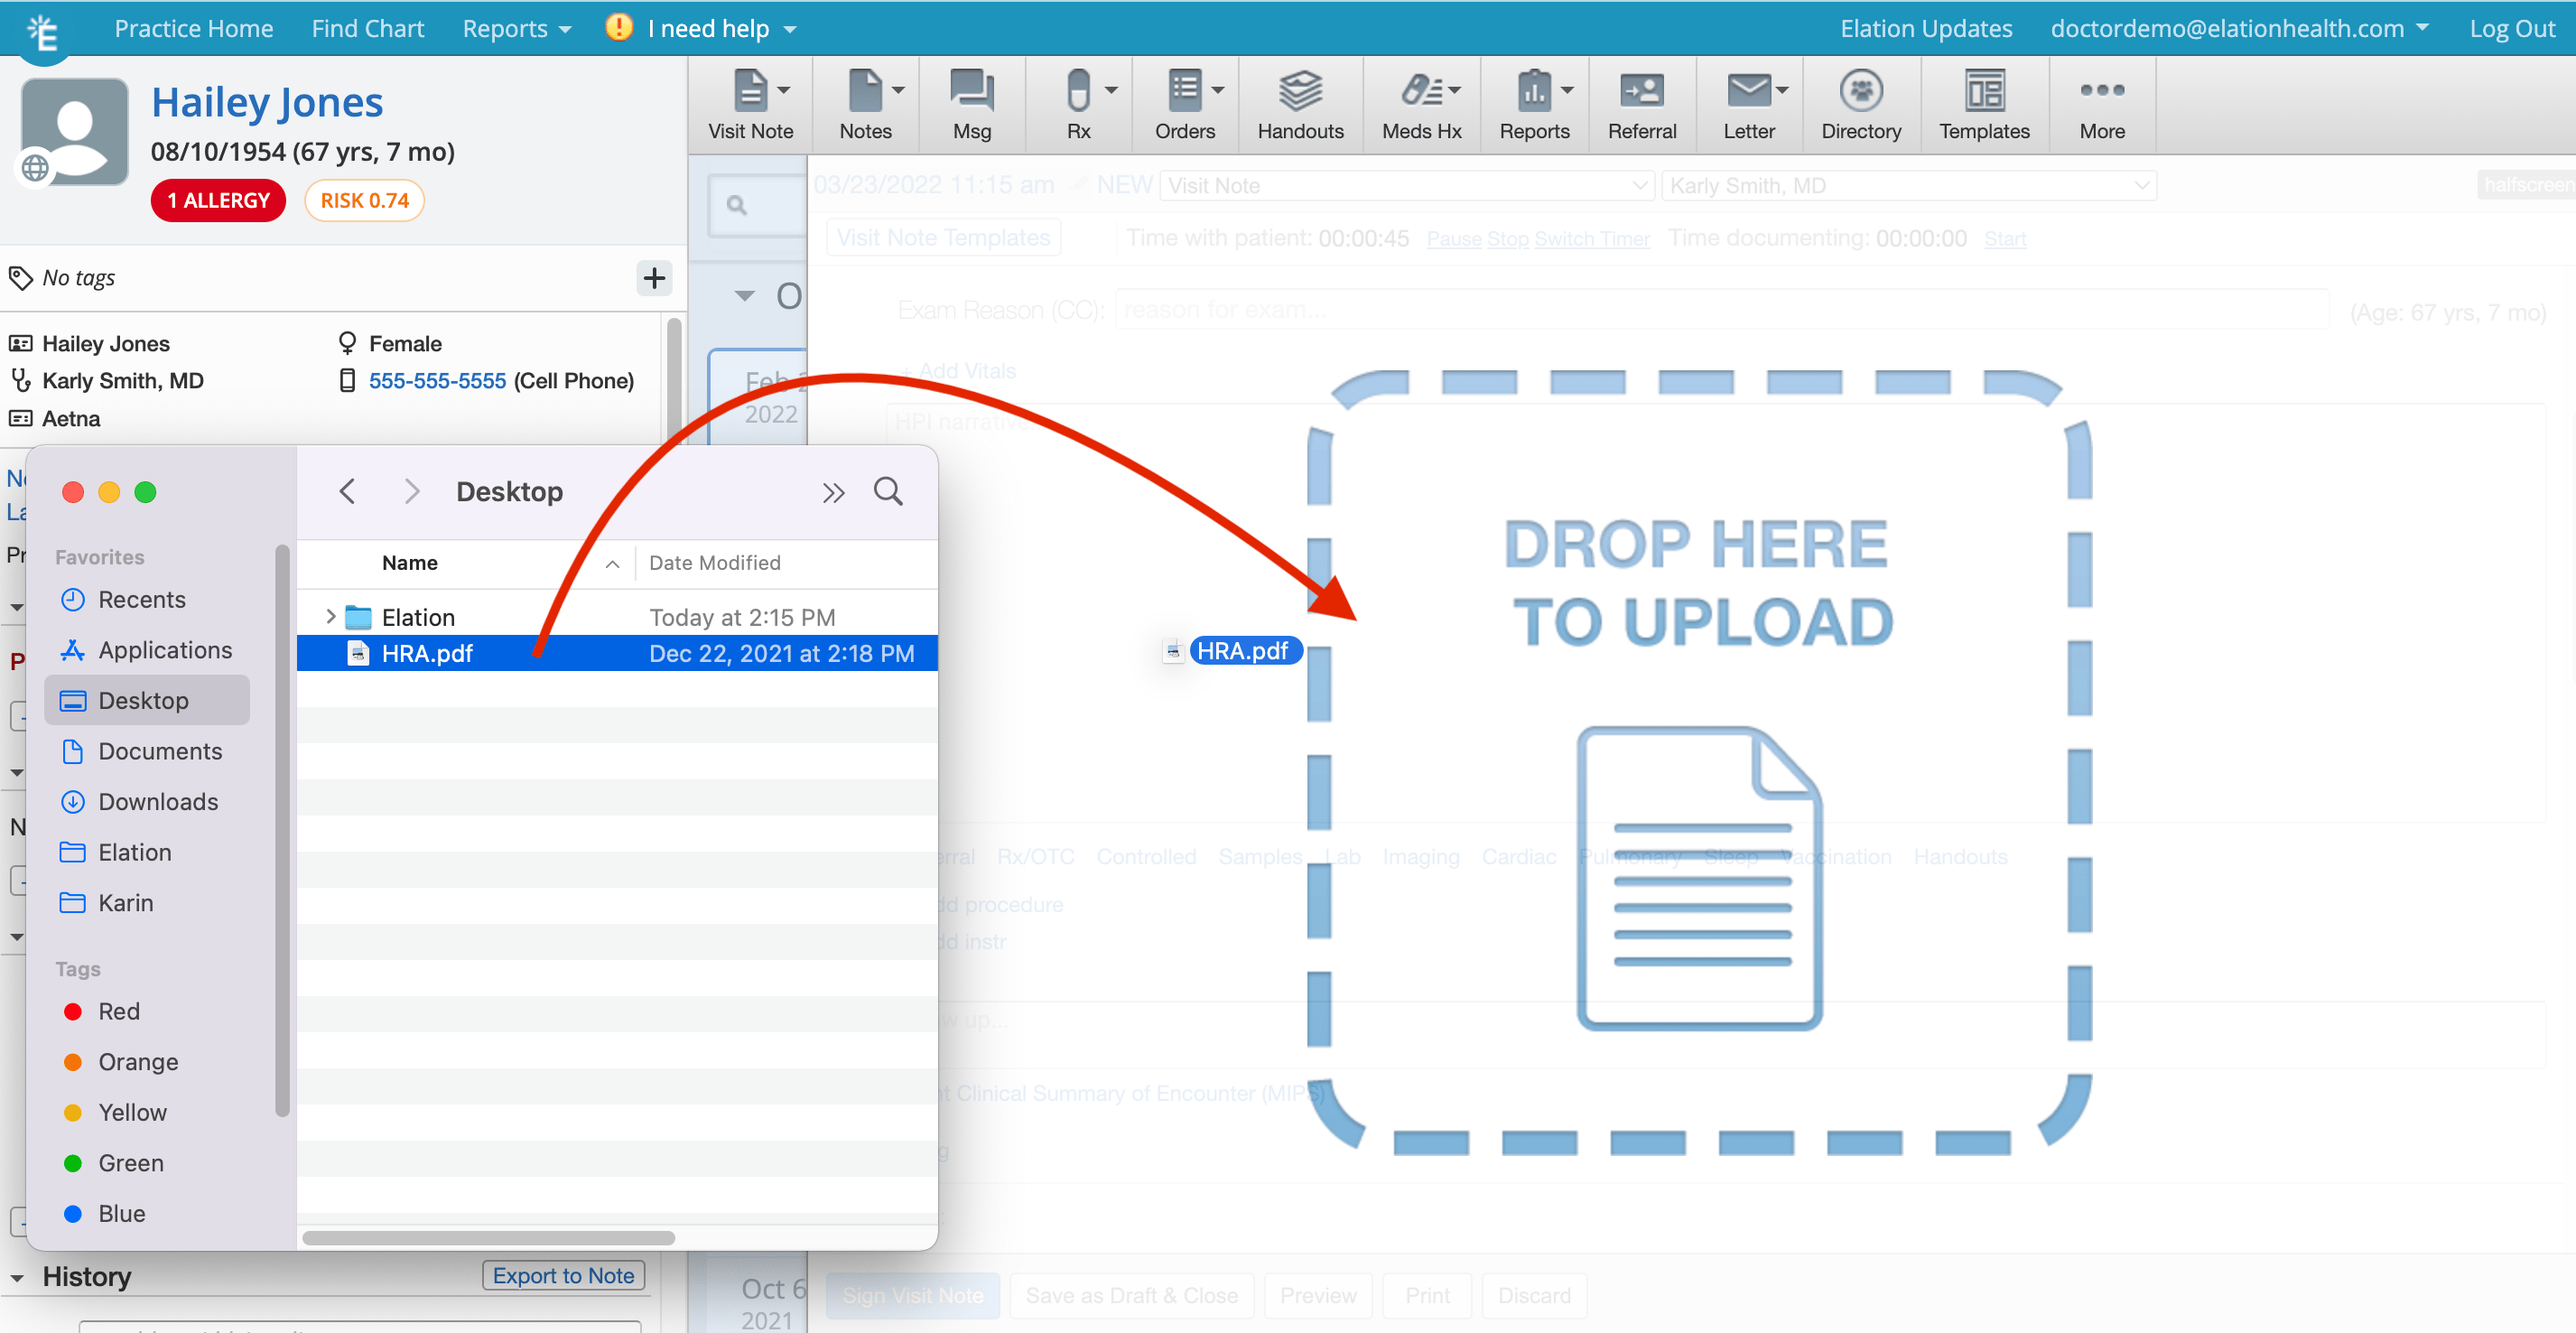
3
Wait for processing
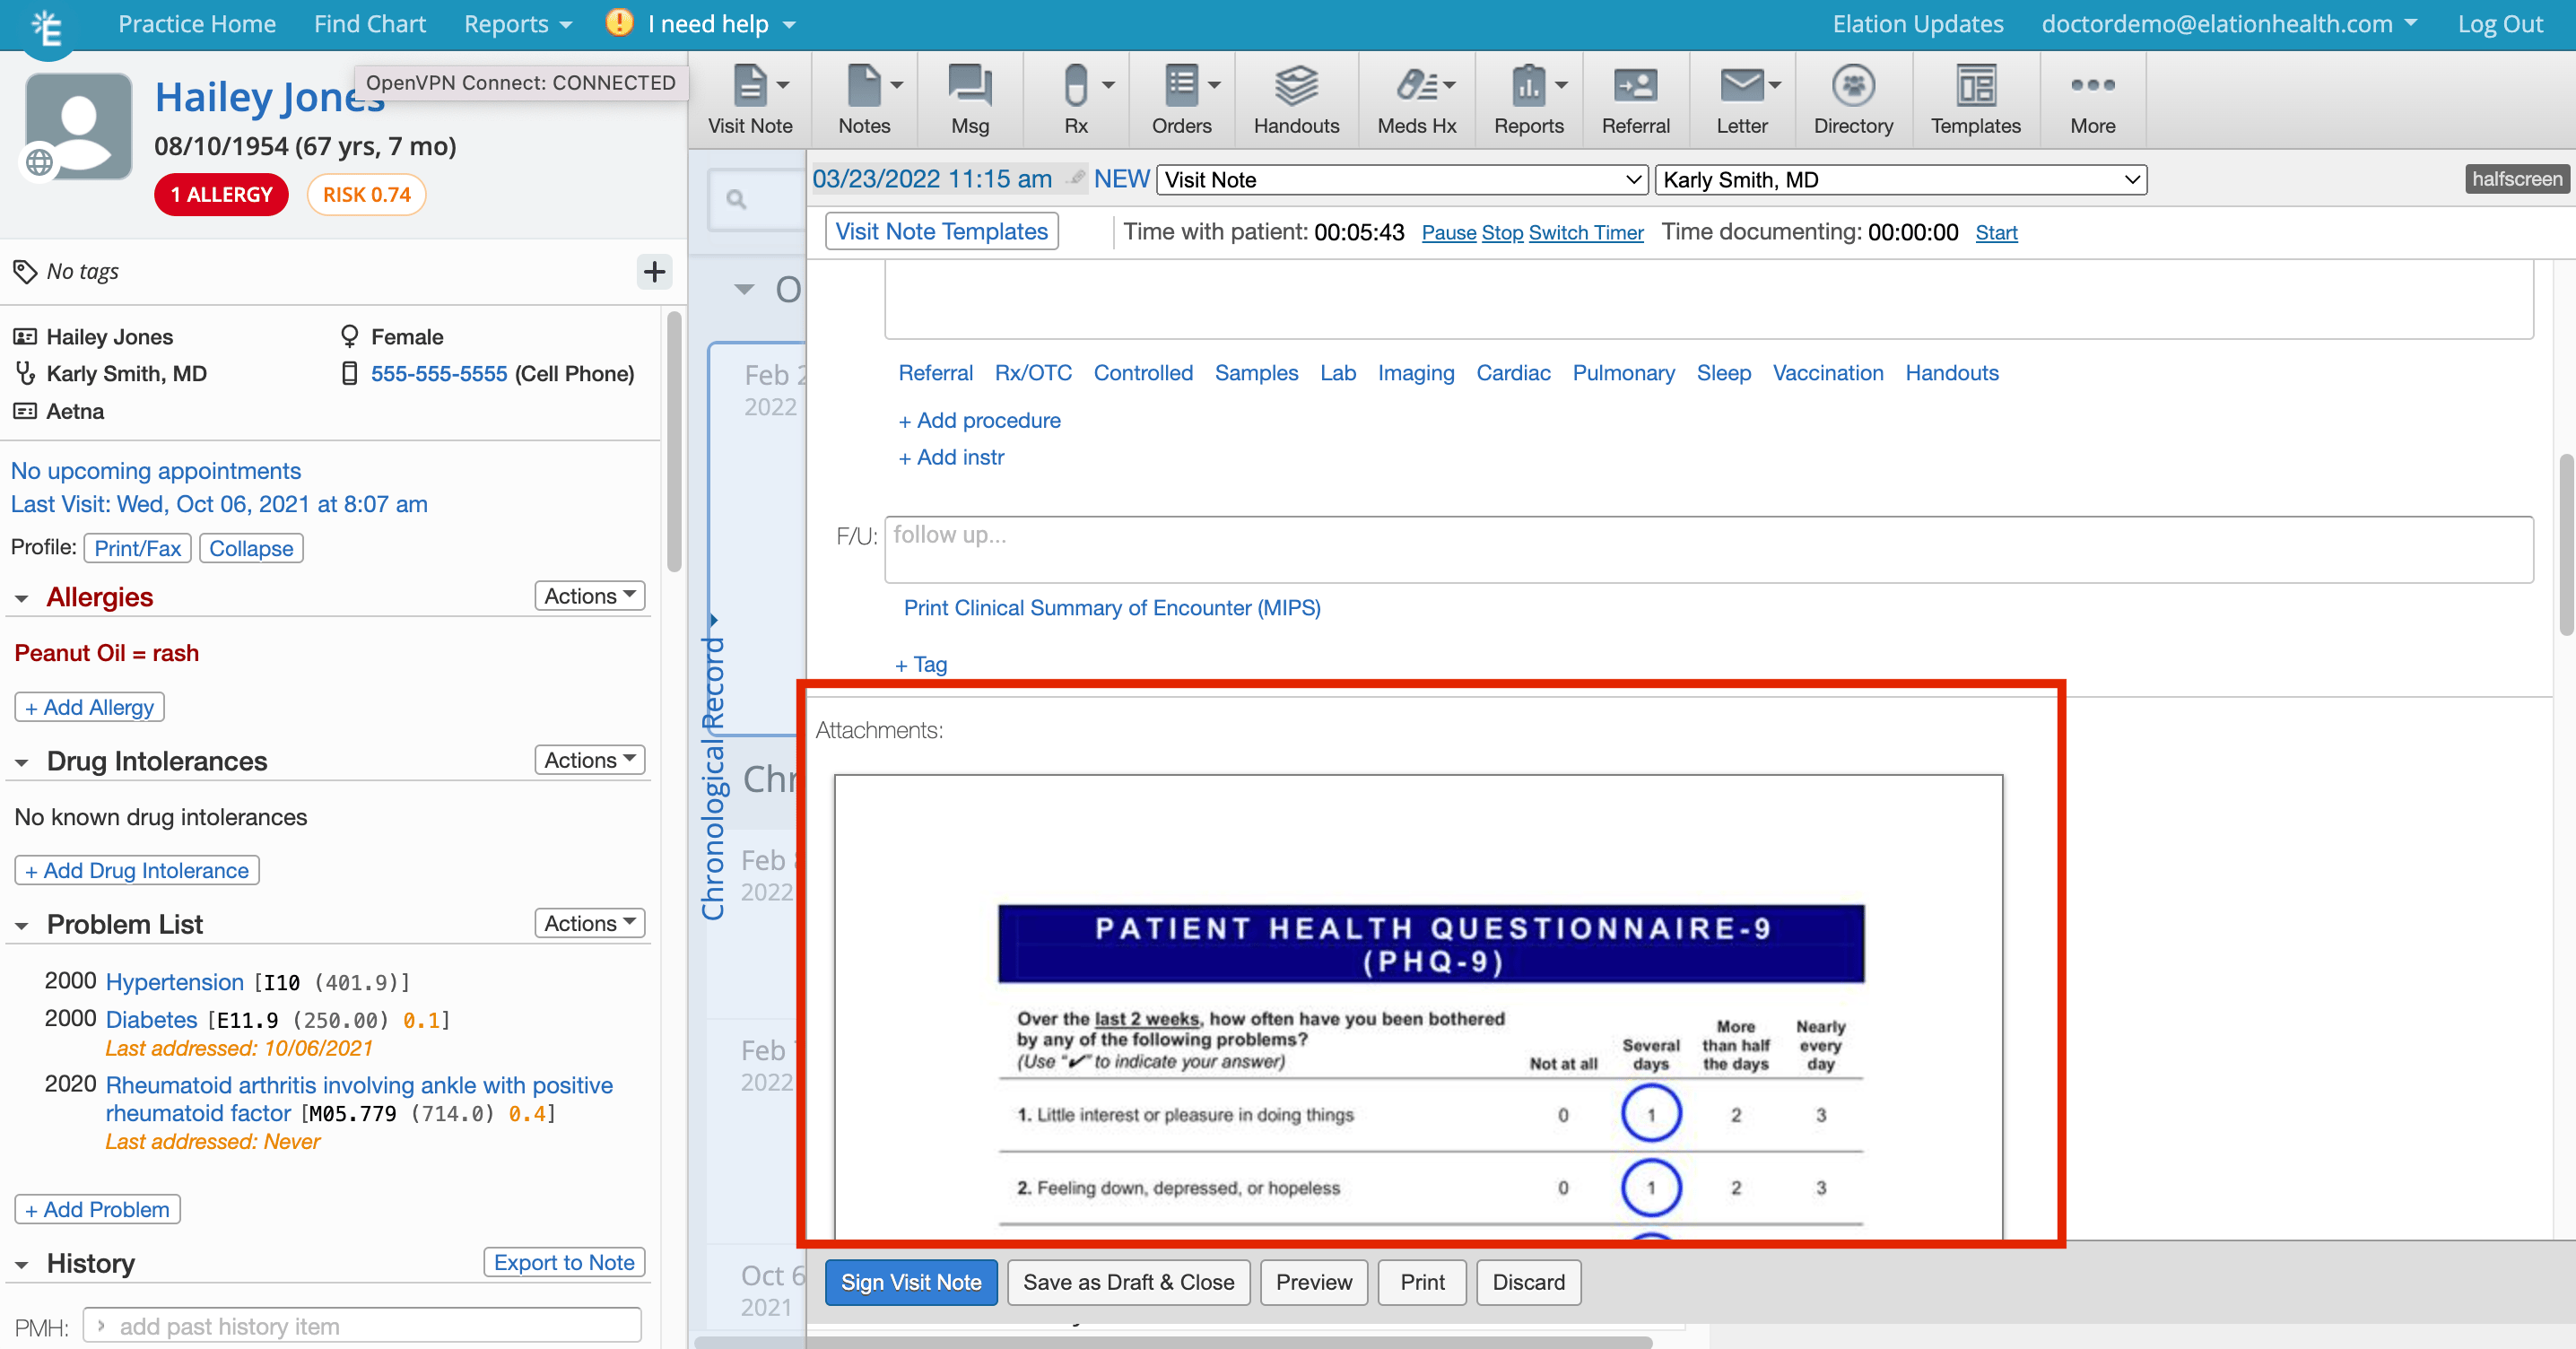
Once the document is processed it will appear in a new Attachment section immediately below the Follow Up section of the visit note draft.