
Where the Note Assist controls appear
The Note Assist controls appear in a row at the top of an open visit note. You start and stop recording from the note itself, so there is no separate dialog to open.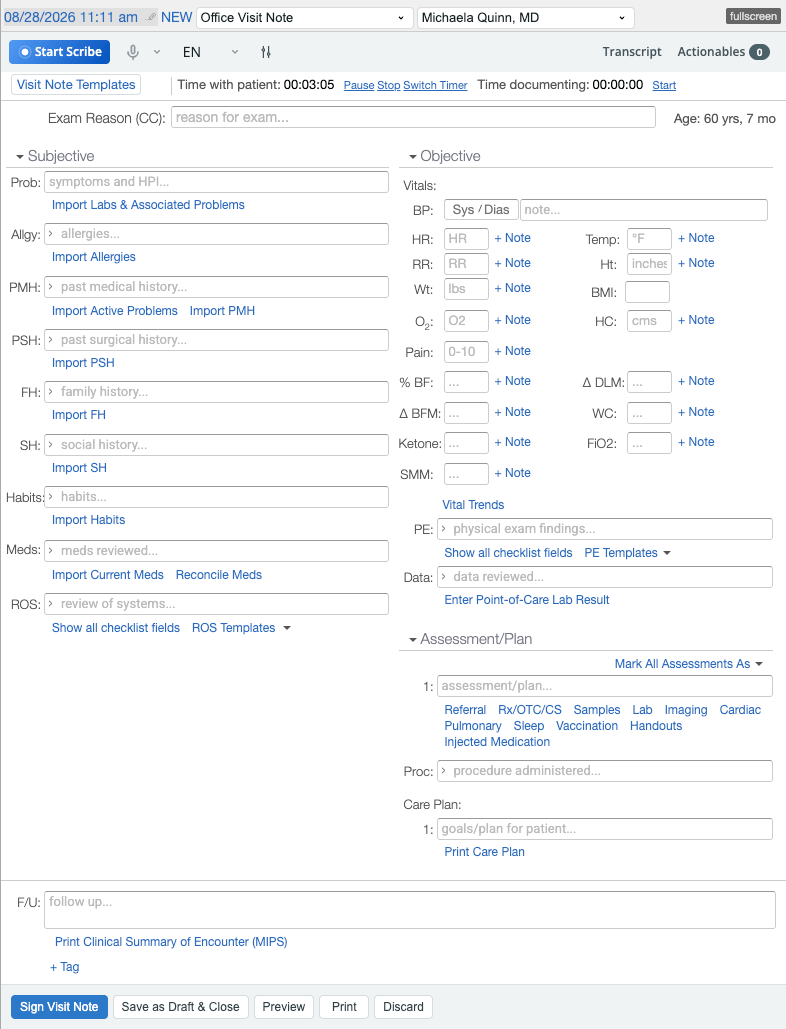
Recording a visit
1
Open the visit note
Create or open the visit note for the encounter and prepare it as you normally would, including applying any visit note templates.
2
Check your microphone and language
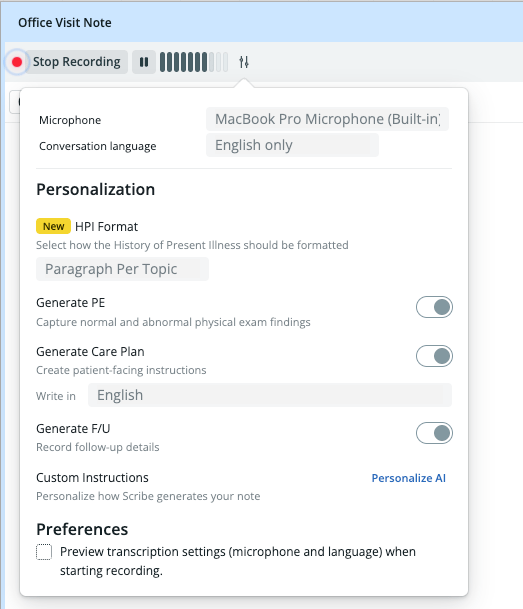
Confirm the microphone and language shown in the controls are correct before you begin. Both can only be changed before recording starts.
3
Click Start Scribe
Recording begins and a red status dot appears. Start Scribe is replaced by Stop Recording and Pause, and an audio level meter shows that Note Assist is picking up sound.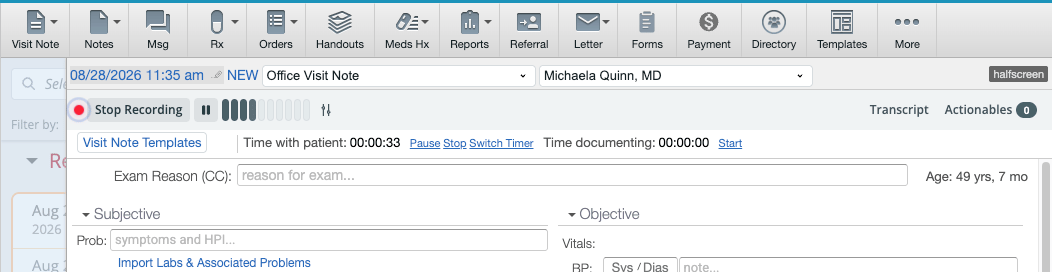
4
Pause and resume as needed
Click Pause to stop capturing audio without ending the session, and Resume Recording to continue. Pausing is useful when the conversation moves to something you do not want in the transcript.
5
Click Stop Recording when the visit ends
Note Assist finalizes the session and the controls show Generating Note while it works. You can keep working in the note while it finishes.
6
Review the generated text and sign the note
Text generated by Note Assist appears with a light orange highlight. Edit anything that needs correcting, then sign the note as you normally would.
Adjusting settings and personalization
The settings icon in the controls opens a panel holding the personalization options that shape how Note Assist writes the note: HPI format, whether it generates the physical exam, care plan, and follow-up, the language it writes in, and a link to your custom instructions.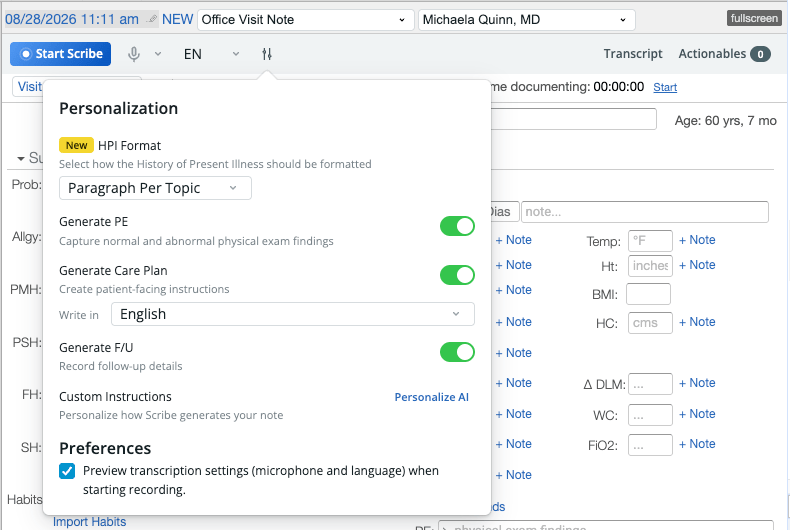
Ending a session
Stop Recording is the only way to end a session. There is no cancel or discard option, so anything captured before you stop is processed into the note.Closing the visit note while recording
Closing the note does not stop the recording. The session keeps running in a floating Note Assist window. Reopen the visit note to get the controls back and finish the session.Recording one visit at a time
Note Assist records one visit note at a time. What you see depends on how you open the second note. Opening a second note in the same browser tab. The controls on the second note are greyed out, and hovering over them shows Note Assist is currently being used with a different note. Go back to the first note to finish that session before recording on this one.
When the controls are unavailable
Note Assist does not support every visit note. On an unsupported note, Start Scribe is greyed out and a message explains why. See Note Assist Guide - When Note Assist isn’t available on a visit note for the full list and what to use instead.Related Articles
- Note Assist Introduction (Add-On)
- Note Assist Guide - Using Note Assist for encounters
- Note Assist Guide - Preparing to use Note Assist
- Note Assist Guide - When Note Assist isn’t available on a visit note
- Note Assist Guide - Microphone Set-up and Troubleshooting
- Note Assist Guide - Frequently Asked Questions