What is eOrdering with Clinical Pathology Laboratories (CPL)?
Elation and Clinical Pathology Laboratories (CPL) have partnered to bring you a bidirectional interface to make the process for ordering labs more efficient for your practice.- You will now be able to submit orders for labs to CPL directly within Elation without manually printing and faxing the order.
- We built CPL’s laboratory compendium and ask-on-entry prompts directly into the lab requisition form, to ensure that your practice is always selecting a CPL-specific, CPL-approved lab test to be performed.
Requesting Clinical Pathology Laboratories (CPL) integration & managing lab settings
The Labs settings page allows you to manage your preferred lab vendors. You can add Clinical Pathology Laboratories (CPL) as a vendor and then click I need help -> Contact Elation Support and notify Elation that you would like to set up an integration with CPL. Please reference the Labs Settings Guide for more information on the Labs settings page.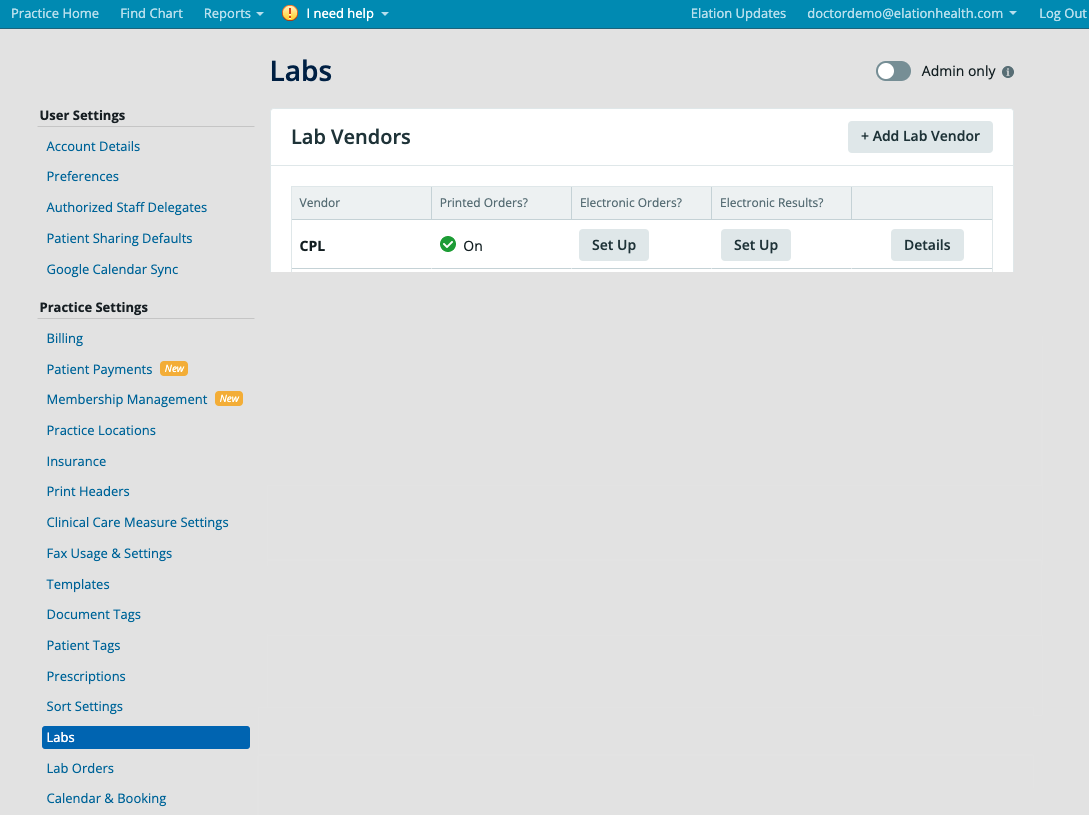
Managing order sets
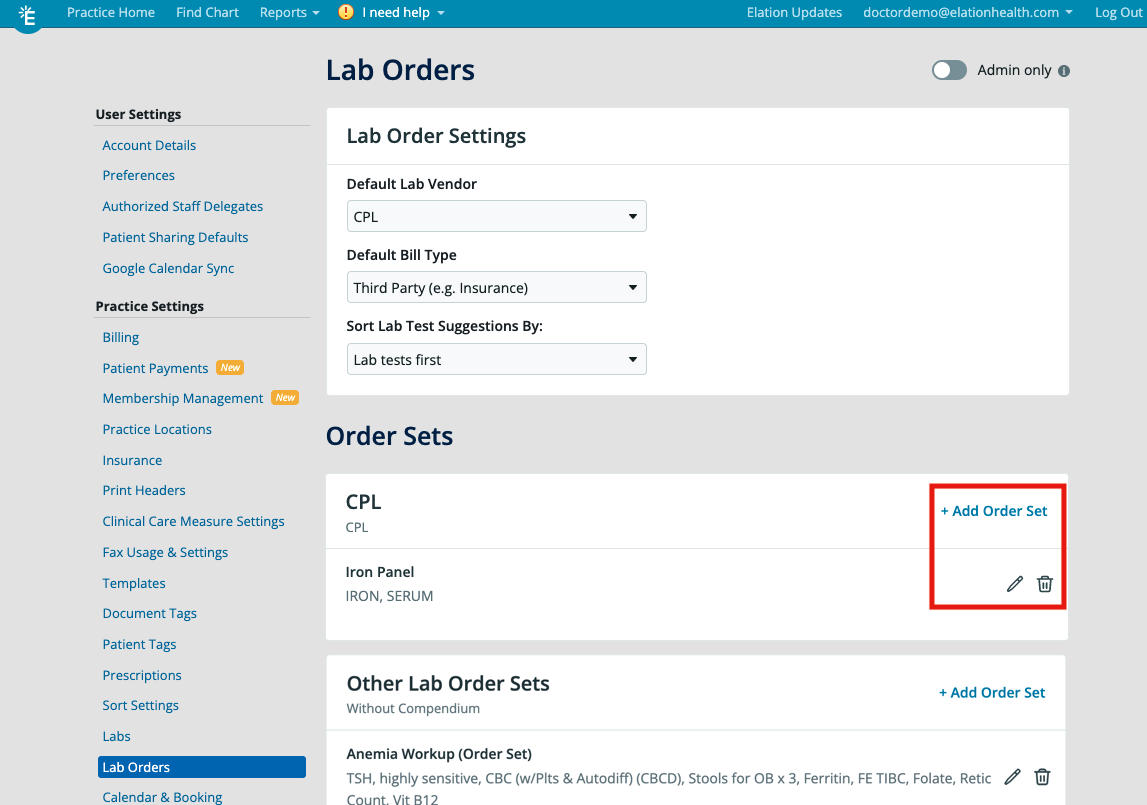
The Lab Orders settings page contains:- Lab Order Settingsfor default lab vendor, bill type and test sorting
- custom Lab Order Sets created for any lab vendor with eOrdering, such as Clinical Pathology Laboratories (CPL), as well as Lab Order Setsfor manual lab requisitions for regular lab vendors.
-
Due to the nature of structured order compendiums, you will only be able to select from CPL’s compendium database and will not be able to create or select lab tests created by your practice.
Adding new order sets
To add new order sets- click the “+ Add Lab Order Set” button
- enter a Name for the order set
- search for and select the appropriate lab Tests
- select diagnosis (Dx) codes commonly related to this order set (as needed)
- click “Save”
No two Order Sets can have the same name, regardless of if they are for different lab vendors.
Editing or removing order sets
To edit an existing Order Set- click on the pencil icon next to the order set
- make any edits as needed
- click “Save” to save your edits.
Clinical Pathology Laboratories (CPL) Order Form overview
To create an electronic lab order for Clinical Pathology Laboratories (CPL), click on “Orders” >> “Lab Order” at the top of the patient’s chart.Lab vendor & site
You can add specific Clinical Pathology Laboratories (CPL) locations to the Labs settings page (“Clinical Pathology Laboratories (CPL)” >> “Details” >> ”+ Add a location”) to select from when printing a requisition out for patients. However, you do not need to select specific CPL locations (e.g. “CPL San Francisco, 123 Street”) to successfully send a CPL order electronically for patients to complete the order. All CPL locations will have the electronic order on file.In-house lab draws
If your practice collects specimens in-house, select the “In-House-Draw” option on the “Any Site” menu in the lab requisition form. Use the “Collection Date” and “Collection Time” fields to enter relevant information for the electronic order and/or requisition printout.Tests
Clinical Pathology Laboratories (CPL) electronic ordering in Elation uses the CPL compendium database for test selection. The database is supplied and maintained by CPL and is updated on a monthly basis. You will not be able to create your own tests or select previously created lab tests from your database.Diagnoses
The Dx field will auto-populate if an order set with associated diagnosis codes is selected, or you can utilize our search function by typing out the name of the problem or diagnosis and selecting from the returned results.Bill Type
You can select the patient’s method for billing in the Bill Type field on the lab order form. The dropdown shows CPL’s required selection options. Depending on the selected Bill Type, Elation will send associated details in the electronic order to Clinical Pathology Laboratories (CPL). These may include insurance or guarantor information. These are the various Bill Types and their uses:- Third Party= Bill the Patient’s insurance information on file
- Patient= Bill the Patient directly
- Client= Bill my practice
- Worker’s Comp= Bill the patient’s worker’s compensation payer
- Special Billing= Allows you to designate that you have some kind of special discount code or code that you would like to associate with this order. Add the code to the Lab Instr field
Sending the order electronically to Clinical Pathology Laboratories (CPL)
When completing a lab order, you will have the option to either send the order electronically (“eOrder”) to Clinical Pathology Laboratories (CPL) or print the lab requisition and hand it directly to the patient.We recommend making sure the patient has the following information on file in their chart when you send an order electronically to CPL to ensure a smooth experience for the patient. Review the Patient Demographics Guide- Managing patient insurance article for additional instructions on how to manage patient insurance in Elation.
- Patient’s full address
- Guarantor information
- Insurance Name
- Insurance Address
- Insurance City
- Insurance State
- Insurance Zip
- Group ID
- Member ID
Printing requisitions and specimen labels
The requisition form can be printed directly from the chronological timeline, or from the Lab Reports view.- To print from the chronological timeline, hover over the lab order, click “Actions” >> “Print” or “Print Specimen Labels”.
- To print from the Reports tab, select the desired lab order, then click “Actions” >> “Print” or “Print Specimen Labels”.
Reordering, changing, and canceling electronic orders
Previous lab orders can be easily re-ordered by hovering over the order from the chronological record or from the Reports tab and clicking “Actions”, then “Reorder”.Receiving Clinical Pathology Laboratories (CPL) test results
Once a patient completes a lab order and the results are finalized, Clinical Pathology Laboratories (CPL) will send you the test results directly through Elation. For more information about receiving electronic test results, see the Lab Reports- Viewing results from lab interfaces article.Close-the-loop feature
Being aware of outstanding orders is vital to prioritizing patient outreach efforts and informing future care plans, which is why we have incorporated an optional set of features that will help your practice keep track of outstanding orders. Learn more about the Close-the-Loopexperience and how to request access in the Orders Guide- Following up on outstanding lab, radiology or other orders article.Frequently Asked Questions (FAQ)
What if the test I am looking for is not available?
The directory of all tests available (compendium), is supplied and maintained by Clinical Pathology Laboratories (CPL). Elation EHR updates our CPL compendium on a monthly basis. We recommend trying to search for the test using different terms (ex. the Complete Metabolic Panel is known as “Comprehensive Metabolic Panel” for CPL) If you have a question about a specific test code, please contact your Clinical Pathology Laboratories (CPL) representative for assistance or search CPL’s online Atlas portal. Custom CPL codes are not supported at this time.How can I create a lab order for patients without insurance?
If you choose “Patient” as the Bill Type then you do not have to enter insurance information for the patient. The patient would then be expected to pay at the lab center.Why can’t I see or select my existing Order Sets?
Clinical Pathology Laboratories (CPL) requires you to use tests (compendium) from their database. You cannot use your old order sets because those tests are not tied to the CPL compendium. You must create new order sets for CPL eOrdering.My staff can not see the option to eOrder. Why?
Only authorized staff delegates will see the option to eOrder. To add an authorized staff member, providers must navigate to “Settings” >> “User Settings” >> “Authorized Staff Delegates” and add the staff member as an Authorized Staff To Sign Orders. Learn more about staff delegates in this article.How do I link a lab order for a visit note?
To include an order in a visit note, please follow the steps below. Please note the visit note must be created prior to initiating the eOrder:- Open a new visit note.
- Start a new lab order and complete the Lab Order Form.
- Click “eOrder” or “eOrder & Print”.
- The lab order will be referenced and linked in the visit note.