Overview
What happens after forms are completed?
Completed forms will automatically appear in the Outstanding Items section of the patient’s chart. Each form will show up as an individual ‘Report’ that can be reviewed and signed off, along with the date and time it was completed. By default, only Provider Level Users can sign off on forms responses. Admin Level Users can turn on a setting for specific Patient Forms to allow Staff Level Users to sign off on forms responses. This feature is ideal for forms that generally do not require provider oversight such as forms for demographics or insurance collection. Click here for information about this setting.Workflow Instructions
Reviewing and exporting responses to the chart
1 Open the patient’s chart. Each completed form will appear as its own report under Outstanding Items.- By default, completed Patient Forms are filed under the Patient Forms report category.
- To file the forms under a different report category, click Actions -> Edit Details for each form.
- To view all completed Patient Forms at once, click on Reports -> Patient Forms at the top of the chart.
- Both providers and staff will have visibility of all the question texts and answers.
- Look out for any unanswered questions. Questions cannot be set as required which means patients can skip questions and submit a partially completed form.
Exception: Some forms responses can only be exported to specific areas of the chart, even if you select Clinical Profile or Visit Note. (E.g. Demographics: Personal Pronouns or Insurance Card Images - Primary.)
- After exporting, you can modify the wording of the responses in the chart.
- By default, only Provider Level Users can sign off on forms responses. For each form, Admin Level Users can enable a setting that allows Staff Level Users to sign off on its form responses. Click here for information about this setting.
Handling responses for special questions
Processing patient-reported medications in forms
To export a medication:| 1 | Click Match to med . |
|---|---|
| 2 | Search for the medication in the database and select the appropriate match from the list. |
| 3 | Click Save . |
| 4 | Repeat steps 1 to 3 for each patient-reported medication you want to export. |
Processing insurance card images in forms
| 1 | AI-powered algorithms will extract the Group ID and Member ID from the insurance card images and pre-populate those fields for you. Compare the information in the images to what you see in the Group ID and Member ID fields and then compare the data to what you already have stored for the patient to see if updates are needed. 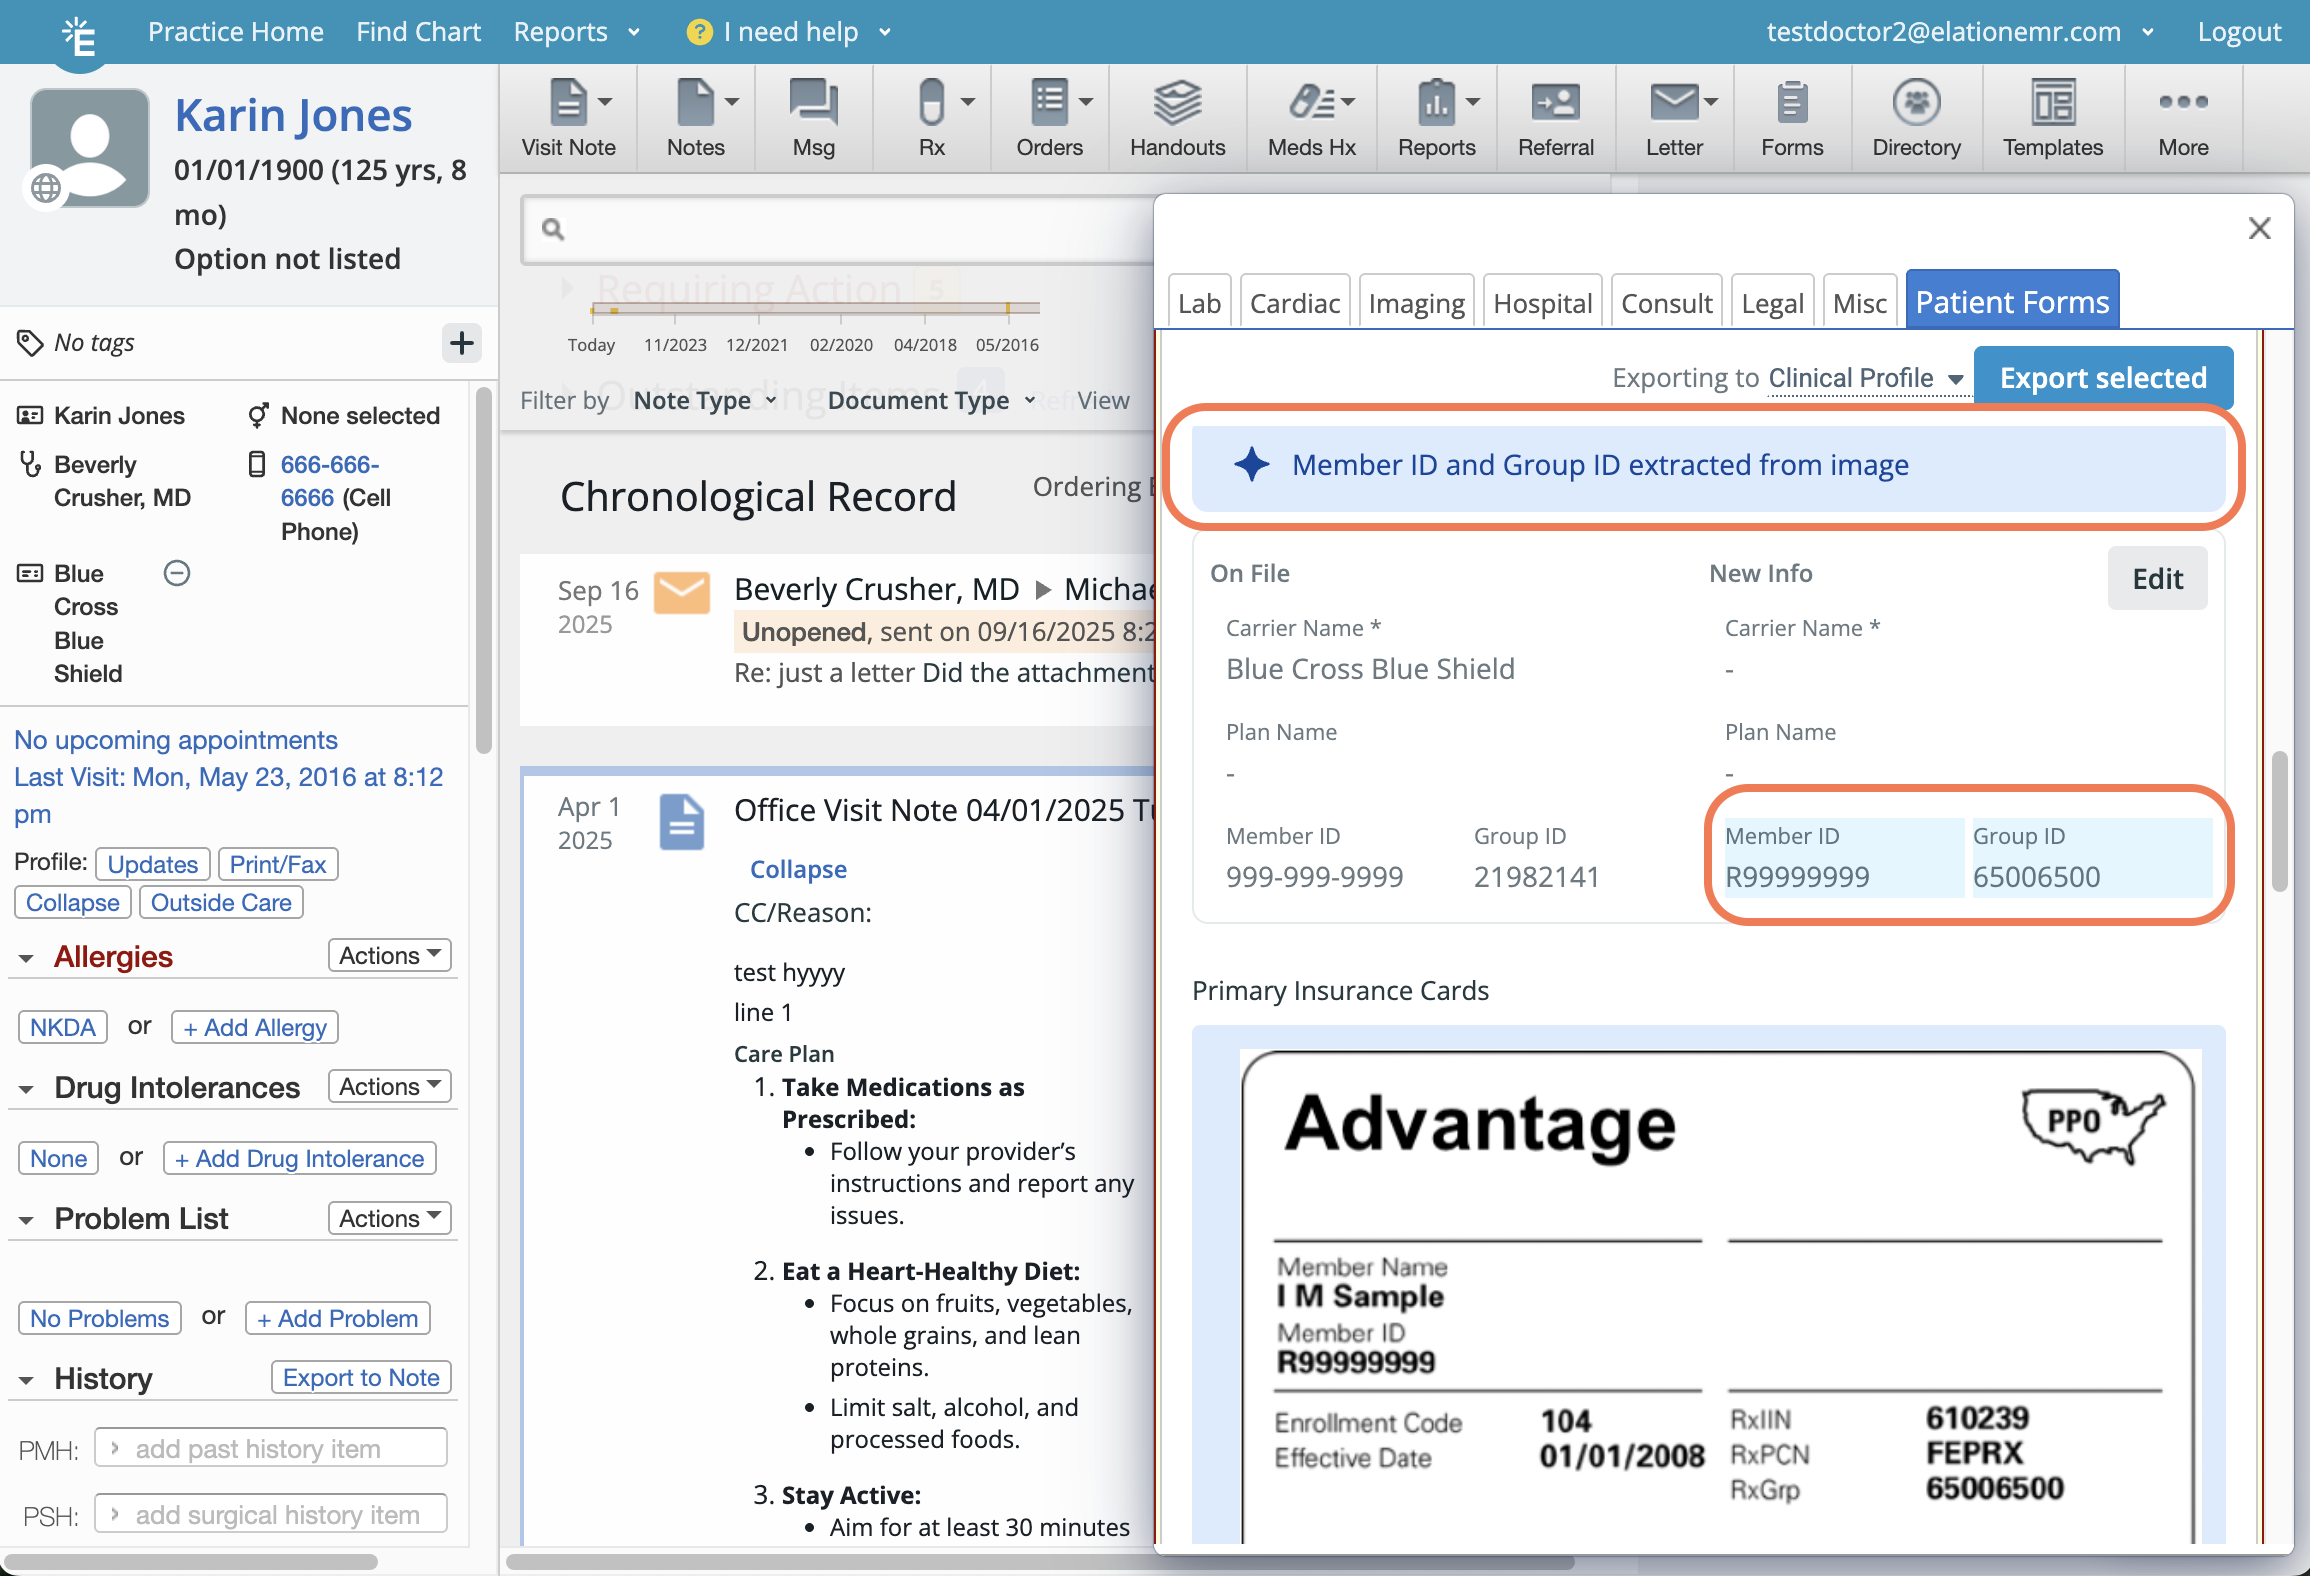 |
|---|---|
| 2 | Click Edit to update the insurance information in your patient’s chart with the information on the new card(s). |
| 3 | Check off the box for insurance card images and click Export selected to export the images to your patient’s demographics. Insurance card images can only be exported to the Demographics section even if you choose Clinical Profile or Visit Note. |
You must update the Insurance Carrier Name, Plan Name, Group ID and Member ID information on file before you can export the images to the patient’s demographics. This is to make sure your patients always have the correct insurance data stored in their chart.Historical insurance card images will be moved to the Historical Insurance Records section of the patient’s demographics.