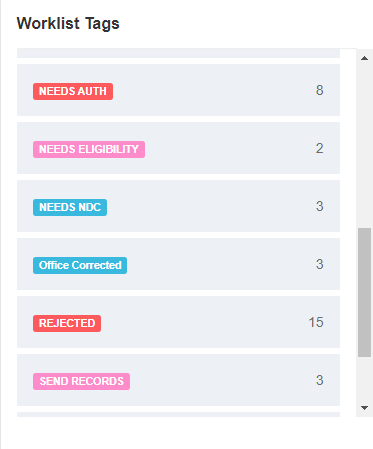
 2. **Alternative Access** - You can also click on a worklist tag from the Dashboard. This will take you to a filtered view of the worklist for that tag.
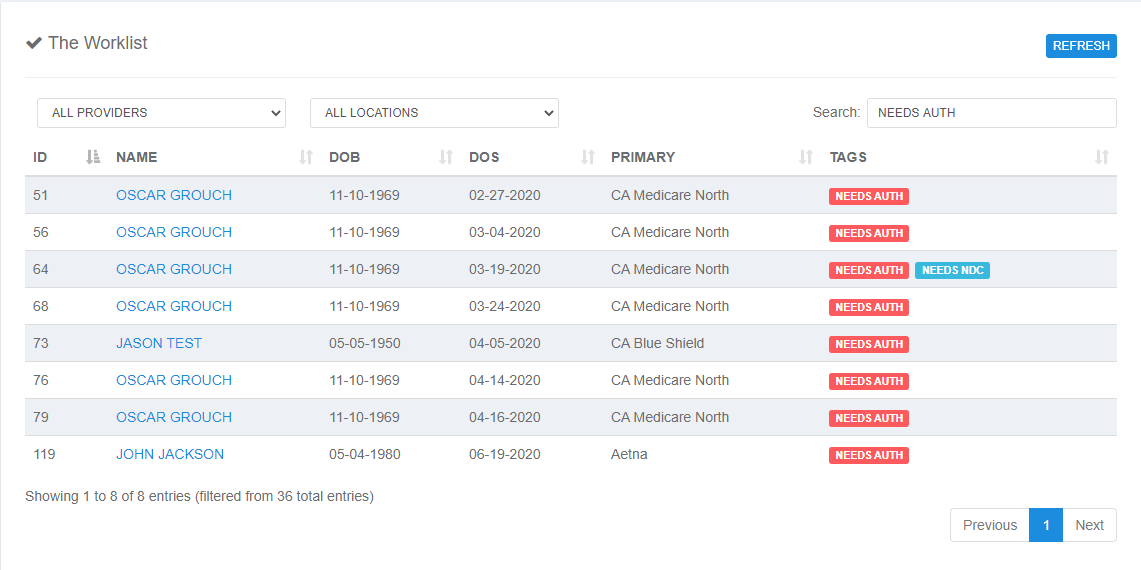
 Now you are looking at a filtered worklist. You can right-click and open in a new tab on claims if you don't want to lose your place on the filtered results.
 ### Add To/Remove From the Worklist
There are basically 3 ways claims end up on the worklist:
* A Clearinghouse Rejection or Payer Denial
* Claim does not pass Billing Rules (controlled in practice settings)
* Manual adding of a Claim to the Worklist
Because the first 2 are automatic, we will focus on the 3rd, Manually Adding.
#### Manually Add To/Remove From the Worklist
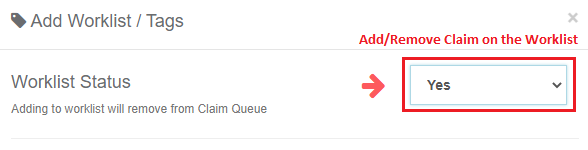
1. **Access Tags** - On a **Superbill's** page, click on the **Tags** button or the **Worklist** button.
2. **Select Yes or No** - Select **Yes** or **No** to add or remove a claim from the worklist, then **Save**.
### Add To/Remove From the Worklist
There are basically 3 ways claims end up on the worklist:
* A Clearinghouse Rejection or Payer Denial
* Claim does not pass Billing Rules (controlled in practice settings)
* Manual adding of a Claim to the Worklist
Because the first 2 are automatic, we will focus on the 3rd, Manually Adding.
#### Manually Add To/Remove From the Worklist
1. **Access Tags** - On a **Superbill's** page, click on the **Tags** button or the **Worklist** button.
2. **Select Yes or No** - Select **Yes** or **No** to add or remove a claim from the worklist, then **Save**.

 ### Add or Edit Tags
#### Claims Without Tags
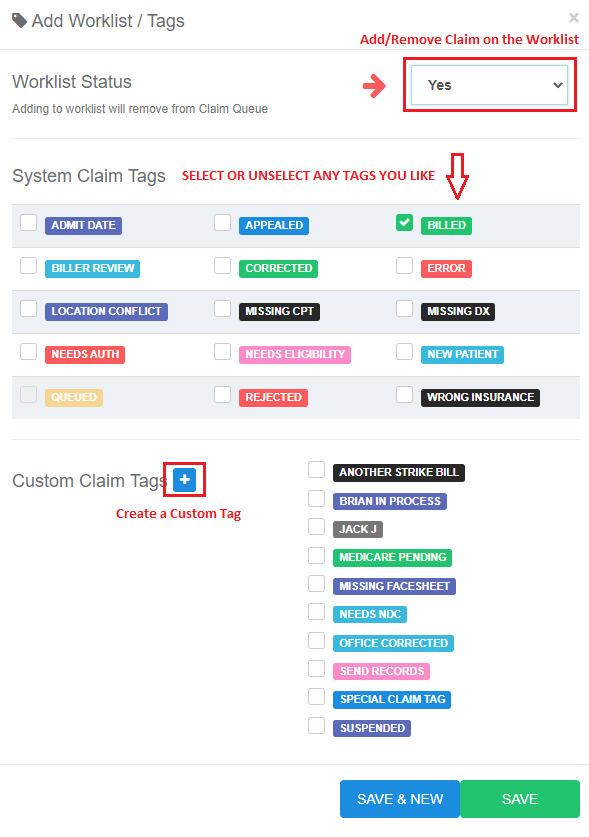
Claims that do not have any tags are automatically categorized under the **general Superbill tab** in the Billing tab. This ensures untagged claims remain easy to locate and manage.
You can **Edit** and **Delete** tags from inside the practice settings. You can **Add** tags at any time. Just click the plus button.
#### Auto-removal of Tags
Some tags are automatically removed based on system actions. For example:
* **Rejection or Denied Tags** - Resolving errors and rebilling a claim will result in the system auto-removing the **rejected** or **denied** tags, ensuring the claim reflects its updated status without manual intervention.
#### Manually Removing Tags
In certain situations, tags must be removed manually. For instance, when a claim is paid or settled without needing a rebill action. To remove tags:
1. **Open the Claim** - Open the claim in Elation Billing.
2. **Access Tags** - Click on the **Tags** section.
3. **Uncheck Tags** - Uncheck any active tags associated with the claim.
4. **Save** - Click **Save** to complete the process.
### Add or Edit Tags
#### Claims Without Tags
Claims that do not have any tags are automatically categorized under the **general Superbill tab** in the Billing tab. This ensures untagged claims remain easy to locate and manage.
You can **Edit** and **Delete** tags from inside the practice settings. You can **Add** tags at any time. Just click the plus button.
#### Auto-removal of Tags
Some tags are automatically removed based on system actions. For example:
* **Rejection or Denied Tags** - Resolving errors and rebilling a claim will result in the system auto-removing the **rejected** or **denied** tags, ensuring the claim reflects its updated status without manual intervention.
#### Manually Removing Tags
In certain situations, tags must be removed manually. For instance, when a claim is paid or settled without needing a rebill action. To remove tags:
1. **Open the Claim** - Open the claim in Elation Billing.
2. **Access Tags** - Click on the **Tags** section.
3. **Uncheck Tags** - Uncheck any active tags associated with the claim.
4. **Save** - Click **Save** to complete the process.
 ***
## Worklist Tag Automation
Some aspects of the Worklist are Automated. The guide below lays out these tags, statuses, and their associated automations!
***
## Worklist Tag Automation
Some aspects of the Worklist are Automated. The guide below lays out these tags, statuses, and their associated automations!
| Tag | Description |
|---|---|
| Appealed | Appealed will be added once a claim is Appealed through Elation Billing. |
| Billed | Billed will be added once a claim is electronically Billed from the Claims Queue. |
| Biller Review |
Biller Review could be added for two reasons:
|
| Corrected | Corrected will be added once a claim is submitted as a Corrected Claim. |
| Denied | When a claim is Denied, it will automatically be added to the Denied worklist. You can review more information about the Denial via the Claim's History. |
| Location Conflict | This may be added automatically depending on your practice's Billing Rules. Click Here for more info on Billing Rules! |
| Needs Auth | This may be added automatically depending on your practice's Billing Rules. Click Here for more info on Billing Rules! |
| Needs Eligibility | This may be added automatically depending on your practice's Billing Rules. Click Here for more info on Billing Rules! |
| New Patient | This may be added automatically depending on your practice's Billing Rules. Click Here for more info on Billing Rules! |
| No Response |
When Elation Billing hasn't received a qualifying payer response within the threshold set in Settings > Practice Settings > Billing Rules. The default is 30 days. How to resolve it
What won't work Removing the tag manually is temporary — it returns on the next daily job if the claim still meets the criteria. There's no bulk removal option. |
| Queued | The only time a Claim will have this tag is when it is in the Claims Queue. This tag cannot be manually applied like the other tags. |
| Rejected |
The Rejected tag will be added if a claim is Rejected. It will be added to the Worklist. An Alert will be present on the Superbill (as well in the Claim's History) with the text from the Rejection. |