> ## Documentation Index
> Fetch the complete documentation index at: https://help.elationhealth.com/llms.txt
> Use this file to discover all available pages before exploring further.
# Claims Queue
> Learn how to use the Claims Queue to review and submit claims in Elation Billing
This article explains how to navigate, use, and bill claims from the Claims Queue in Elation Billing.
## Overview
### What is the Claims Queue?
The Claims Queue is where your claims land after designating where they'll be billed. It serves as the last stop for claims before they're sent out to their payer(s).
### Why is the Claims Queue important?
The Claims Queue allows you to review claims before submission, make last-minute edits, remove claims that aren't ready, and batch-submit claims to payers efficiently.
## Workflow Instructions
### Navigating to the Claims Queue
There are two ways to reach the Claims Queue:
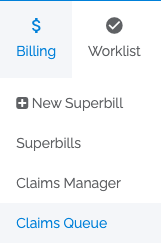
1. **From the Billing dropdown menu** - Select **Claims Queue** from the **Billing** menu.
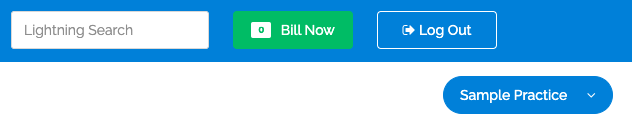
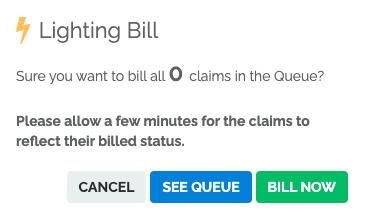
 2. **From the Bill Now button** - Click **Bill Now**, then select **See Queue**.
 ### Using the Claims Queue
Once you are in the Queue, you can see the claims that have been designated for sending to their respective payer(s).
### Using the Claims Queue
Once you are in the Queue, you can see the claims that have been designated for sending to their respective payer(s).
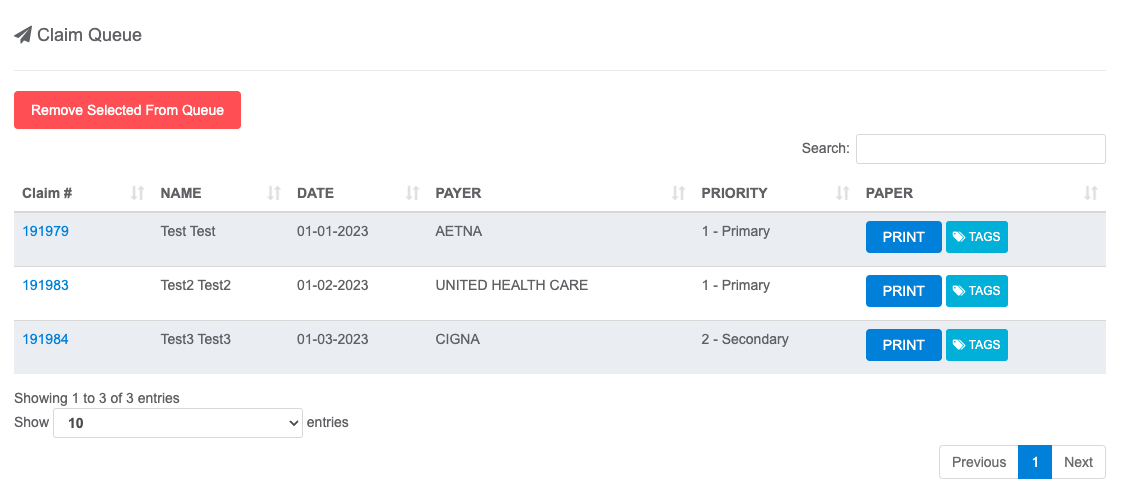 1. **View a Claim** - Click the blue **Claim #** to open the claim in a new tab.
2. **Remove Claims from Queue** - Click anywhere within the claim's row (that isn't a button) to select it, then select **Remove Selected From Queue**.
To select multiple claims for removal, hold **Ctrl** (Windows) or **Command** (Mac) when clicking rows.
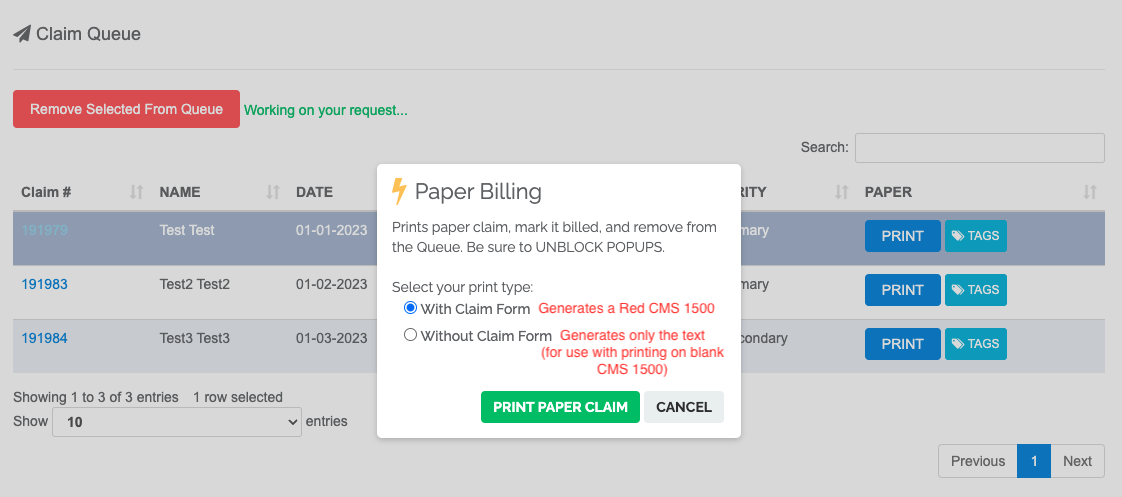
3. **Print for Paper Billing** - Click **PRINT** to generate a claim form, mark the claim as Billed, and remove it from the Queue.
If the 1500 form is not appearing, make sure it hasn't been caught by your popup blocker.
1. **View a Claim** - Click the blue **Claim #** to open the claim in a new tab.
2. **Remove Claims from Queue** - Click anywhere within the claim's row (that isn't a button) to select it, then select **Remove Selected From Queue**.
To select multiple claims for removal, hold **Ctrl** (Windows) or **Command** (Mac) when clicking rows.
3. **Print for Paper Billing** - Click **PRINT** to generate a claim form, mark the claim as Billed, and remove it from the Queue.
If the 1500 form is not appearing, make sure it hasn't been caught by your popup blocker.
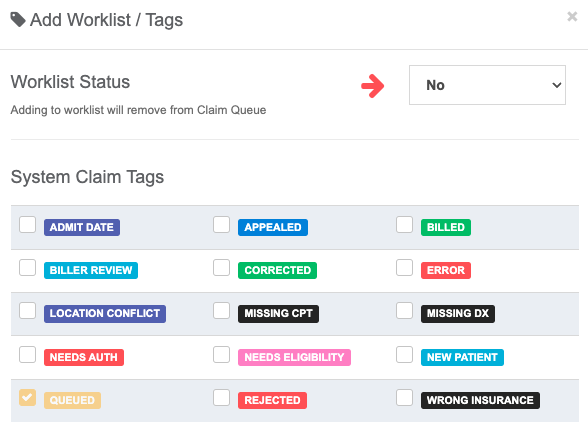
 4. **Manage Tags** - Click **TAGS** to update the tags on a claim. By default, any claim in the Queue will be tagged "Queued".
If a claim's Worklist Status is changed to **Yes**, it will be automatically removed from the Queue once this status is saved.
4. **Manage Tags** - Click **TAGS** to update the tags on a claim. By default, any claim in the Queue will be tagged "Queued".
If a claim's Worklist Status is changed to **Yes**, it will be automatically removed from the Queue once this status is saved.
 ### Billing the Queue
1. **Submit Claims** - When you are ready to send your Queue off to the payer(s), click the **Bill Now** button, then click **Bill Now** in the popup that appears.
2. **Automatic Tag Update** - Billing claims will automatically change their Tag from **Queued** to **Billed**.
3. **Claim Transmission** - At this stage, the claims will be sent to the clearinghouse, where they'll be routed to the payer.
## Related Articles
* [Filing a Claim](/articles/filing-a-claim)
* [Using the Worklist](/articles/using-the-worklist)
* [Print a Claim](/articles/print-a-claim)
### Billing the Queue
1. **Submit Claims** - When you are ready to send your Queue off to the payer(s), click the **Bill Now** button, then click **Bill Now** in the popup that appears.
2. **Automatic Tag Update** - Billing claims will automatically change their Tag from **Queued** to **Billed**.
3. **Claim Transmission** - At this stage, the claims will be sent to the clearinghouse, where they'll be routed to the payer.
## Related Articles
* [Filing a Claim](/articles/filing-a-claim)
* [Using the Worklist](/articles/using-the-worklist)
* [Print a Claim](/articles/print-a-claim)